Showing posts with label Cooking. Show all posts

Care of Cast Iron Pans

SUBHEAD: There's no need for a non-stick pan when you have a well-seasoned cast iron pan.

By Gina Biancaniello 10 September 2014 for the Kitchn -
(http://www.thekitchn.com/how-to-season-a-cast-iron-skillet-cleaning-lessons-from-the-kitchn-107614)


Image above: Seasoning a cast iron skillet in a 325º oven. From original article.

How To Season Cast Iron Cookware

In recent years, I fell in love with my cast iron skillet. It’s one of my most used kitchen tools. It’s the perfect vessel to cook up a great pork chop, crisp up some chicken thighs or even bake a great batch of brownies. I love being able to transfer things from the stovetop to the oven with ease. Oh, and they’re super easy to clean!

You can use a cast iron skillet for most anything as long as you take the time to maintain it and keep it in good condition. I’m going to show you how to easily season your cast iron skillet and keep it in great working order!

I know I mentioned I’ve only in “recent years” come to love cast iron, but there’s nothing new about this material. I’m sure most of you have memories of your grandparents or even great-grandparents lugging out their heavy-bottomed skillets and frying up dinner.

There’s a reason these pans get passed down from grandparent to grandchild. There is science behind the seasoning process and the skillet’s durability! Learn how to maintain your pan, and it will last you a lifetime.

Let’s get to seasoning!

Materials
Cast iron skillet
Dish soap
Sponge or stiff brush
Clean, dry cloth or paper towels
Vegetable oil or shortening (or other oil of your choice)

Equipment

Oven

Instructions

  1.  Preheat oven to 325°F.

  2. Wash the skillet with warm, soapy water and a sponge or stiff brush. Cast iron should not normally be washed with soap, but it's fine here since the pan is about to be seasoned.
  3. Rinse and thoroughly dry the skillet.

  4. Using a cloth or paper towel, apply a thin coat of vegetable oil or melted shortening to the inside and outside of the skillet. Vegetable oil and shortening are the most commonly recommended oils used for seasoning, but according to Lodge, you can use any oil of your choice.

  5. Place the skillet upside down on the oven's center rack.

  6. Place a sheet of aluminum foil below the rack to catch any drips.

  7. Bake for an hour.

  8. Turn off heat and allow to the skillet to cool completely before removing from oven.

Additional Notes: A seasoned skillet is smooth, shiny, and non-stick. You'll know it's time to re-season if food sticks to the surface or if the skillet appears dull or rusted.


By Katherine Martinko 10 September 2014 for TreeHugger -
(http://www.treehugger.com/green-home/how-care-cast-iron-frying-pan.html)


Image above: Cooking vegetables in a cast iron skillet. From original article.

How To Care for Cast Iron Cookware

My favorite kitchen tool is an old cast iron frying pan that my dad gave me years ago. He found it in the woods, rusty and caked with dirt from sitting outside.

Despite the pan’s awful appearance, he believed in its integrity: “Just take it home, clean it up, season it, and you’ll have a great frying pan.”

I was skeptical, but my husband tackled the cleaning and seasoning of the pan with great gusto. After a few smoky hours of rubbing the hot iron with lard and baking it on, the pan was finally ready.

That pan has gone above and beyond what I ever expected. Long gone is the Teflon pan I used to have, with its sketchy-looking scrapes and missing chunks of non-stick coating.

I don’t miss it at all because the cast iron pan, if used properly, works just as well as a non-stick one. It even adds iron to one’s diet; anemics are told to cook their food in cast iron in order to benefit from the few milligrams of iron that leach from the pan with each meal.

In order for it to work well, however, you must take care to use it properly. Here are some tips for using cast iron after it’s been seasoned:

Instructions

  1. Never clean it with soap, and never use steel wool to scrub it. If you have some stubborn food, add a bit of water and heat until it softens, then use a stiff plastic brush to rub it, since that won’t destroy the seasoned surface.

  2. Don’t cook anything that's acidic in the pan, such as tomatoes, lemon juice, vinegar. The acidity eats away the seasoning and leaves you with a brand new-looking pan, which is pretty but not the look you want. (Acid is fine in a ceramic-coated cast iron pan, such as Le Creuset.)

  3. To get that non-stick effect, heat the cast iron first before adding anything. Add oil to the hot pan right before adding the food. This will result in perfect non-stick eggs that slip right out of the pan.

  4. Never shock a hot cast iron pan with cold water because it can crack.

  5. Don’t soak or leave a wet pan in the dish rack because this will promote rust. Always dry it over a low burner, then re-season with a quick wipe of shortening or vegetable oil on a cloth or paper towel before storing.

All of this may sound like a lot of extra work, but the result is worthwhile. You’ll have an amazingly flexible pan that can sear, sauté, simmer, bake, and broil, and you’ll feel better knowing that your family is eating food prepared in an all-natural, non-toxic way.

.

Efficency of well tended fires

SUBHEAD: Counter-intuitively, a well-tended wood fire can outperform modern cooking stoves.

By Kris De Decker on 23 June 2014 for Low Tech Magazine -
(http://www.lowtechmagazine.com/2014/06/thermal-efficiency-cooking-stoves.html)


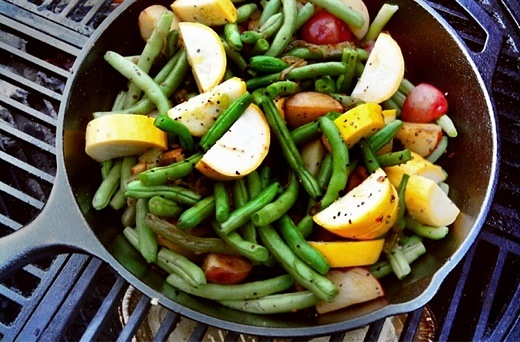
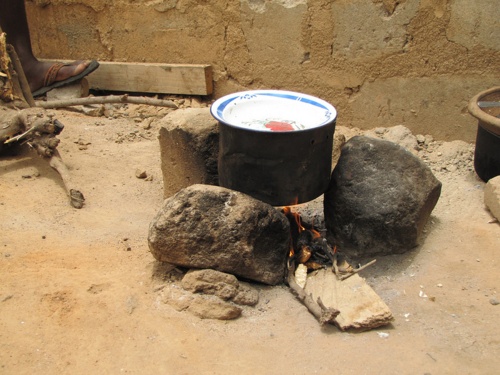
Image above: Well-constructed three-stone fires protected from wind and tended with care score between 20 and 30% thermal efficiency. From original article.

Despite technological advancements since the Industrial Revolution, cooking remains a spectacularly inefficient process. This holds true for poor and rich countries alike. While modern gas and electric cooking stoves might be more practical and produce less indoor pollution than the open fires and crude stoves used in developing countries, they are equally energy inefficient.

In fact, an electric cooking stove is only half as efficient as a well-tended open fire, while a gas hob is only half as effective as a biomass rocket stove. And even though indoor air pollution is less of an issue with modern cooking stoves, research indicates that pollution levels in western kitchens can be surprisingly high.

Present-day cooking methods in poorer countries are quite well documented, as they are one of the main concerns of NGOs which promote appropriate technological development. An estimated 2.5 to 3 billion people still cook their food over open fires or in rudimentary cookstoves, and these numbers keep increasing due to population growth.

The most basic and widely used type of cooking device is the wood-fuelled "three-stone fire", which is made by arranging three stones to make a stand for a cooking pot. Alongside the three-stone fire -- which dates back to Neolithic times -- many types of home-made cooking stoves can be found. They are powered by burning coal or biomass, be it wood, crop residues, dung or charcoal. [1]

Cooking fire inside the houseIndoor cooking in Guatemala. Image: Source: Global Alliance for Clean Cookstoves.

The main concern with the use of crude biomass cooking stoves is their destructive influence on human welfare and natural resources. When used indoors, biomass cooking stoves lead to severe health issues such as chronic lung diseases, acute respiratory infections, cataracts, blindness, and adverse effects on pregnancy. The main victims are women, who do most of the housework, and young children, who are often carried on the mother's back while she is cooking.

Inefficient biomass stoves also force people (again, most often women) to spend much of their time collecting fuel. The environmental degradation caused by biomass stoves is equally problematic. When wood is used as a primary fuel, inefficient cooking methods lead to large-scale deforestation, soil erosion, desertification and emissions of greenhouse gases. For coal-fuelled stoves, the main issue is indoor air pollution.

The Thermal Efficiency of a Three-stone Fire
At the heart of the problem lies the low thermal efficiency of traditional cooking methods. For three-stone fires, thermal efficiency is stated to be as low as 10 to 15%. [1][2] In other words: 85 to 90% of the energy content in the wood is lost as heat to the environment outside the cooking pot.

Obviously, this low efficiency wastes natural resources, but it also boosts air pollution and greenhouse gas emissions because the relatively low temperature of the fire leads to incomplete combustion.

Improved three-stone fireAn improved three-stone fire. Picture: Chef Cooke @ Flickr.

However, the issue is more complicated than it is usually presented. To begin with, the productivity and cleanliness of an open fire (and similar crude cooking stoves) greatly depends on the circumstances in which they are used and on the skills of the cook. In its test of 18 cooking stove designs from all over the world, the Partnership for Clean Indoor Air (PCIA) [3][4] concluded that:
"Well-constructed three-stone fires protected from wind and tended with care scored between 20 and 30% thermal efficiency. Open fires made with moister wood and operated with less attention to the wind can score as low as 5%. The operator and the conditions of use largely determine the effectiveness of operation. If the sticks of wood are burnt at the tips and pushed into the center as the wood is consumed, the fire can be hot and relatively clean burning."
Due to the influence of environmental factors such as wind, an indoor three-stone fire is generally more efficient than one operated outside. However, outdoor open fires can also be made more efficient by placing them in a hole in the ground or by shielding them with the use of earthen walls, which also adds thermal mass. Furthermore, PCIA remarks that "it is important to recognize that the open hearth and resulting smoke often have considerable cultural and practical value in the home, including control of insects".

The Thermal Efficiency of Improved Biomass Stoves
Especially since the 1970s and 1980s, many international NGO's have tried to improve cooking traditions in poorer countries. This has resulted in a large number of so-called "improved cooking stoves", which again vary in terms of design, performance and costs. Hundreds of variations exist. [1][4]
Clean cookstovesA collection of improved biomass stoves. Source: Global Alliance for Clean Cookstoves.

Some of these designs are exclusively aimed at minimising air pollution at the cost of higher fuel consumption, while other designs achieve a higher efficiency but increase air pollution. [4] In this article, we will focus exclusively on cooking stoves that address both issues simultaneously. This is not to suggest that other designs can't be preferable in certain circumstances.

For example, because biomass cooking stoves do not present direct health problems when used outdoors, saving fuel would be the most important aim in that context.

Compared to a basic three-stone fire with 10-15% thermal efficiency, improved cooking stoves can easily halve the fuel requirements of the cooking process. This can be achieved by providing an insulated combustion chamber, improving the air supply, and other measures.

In a laboratory comparison of five major types of biomass cooking stoves, it was found that an improved rocket stove uses 2,470 kJ to boil one litre of water and then simmer it for 30 minutes, while a basic three-stone fire requires 6,553 kJ to fulfill the same task (see the dark blue bars in the graphic above). [5][1] The rocket stove thus uses 60% less fuel than the three-stone fire. Furthermore, the rocket stove boils 2.5 litres of water more than 5 minutes faster (see the light blue points in the graphic above).

The values are the average of three tests and measure specific energy consumption instead of thermal efficiency. Both test methods have their shortcomings -- measuring the efficiency of cooking is suprisingly complex -- so by applying both methods the accuracy of an experiment increases. [6] This was done by the Partnership for Clean Indoor Air, which compared the thermal efficiency and specific energy consumption of 18 cookstove designs, including a well tended open fire with a thermal efficiency of 20-30%. [4]

In this study, one of the best performing improved biomass stoves -- a 20 liter can rocket stove (image at the right) -- convincingly beats the efficiency of the well-tended open fire. It requires 733 grams of wood (12,579 kJ) to bring five litres of water to boil and simmer for 45 minutes, only 65% of the 1,112 grams of wood (19,496 kJ) required by the well-tended open fire. The thermal efficiency of the rocket stove varies between 23 and 54%. [7]

The rocket stove also lowers air pollution: the emissions are only 26% of the carbon monoxide (CO) and 60% of the particulate matter (PM) produced by the well-tended open fire. Lastly, it shortens cooking time to 22 minutes for five litres of water, compared to 27 minutes for the open fire.
The top performing biomass stove in the test is a wood gas stove, with slightly more than one-third the wood consumption (459 grams of wood or 9,434 kJ) and 15-20% of the pollution levels of the three-stone fire. It has a thermal efficiency of 44-46%. However, it requires an electric fan to improve combustion efficiency, while all others are natural-draft stoves.

Cooking in Wealthy Households
There is great irony in the fact that the improved biomass stoves mentioned above are much more efficient than modern cooking stoves used in the western world and in wealthier households of developing nations. In fact, most modern cooking stoves have a thermal efficiency that is on par with that of a three-stone fire.

The western world switched from open fires to closed cookstoves from the eighteenth century. Initially, these "kitchen stoves" were used for both heating and cooking, and were powered by coal, charcoal or biomass. When central heating systems were introduced in the early twentieth century, the
Conventional electric hobs use attached iron plates as their heating units, while more sophisticated models use infrared, halogen or induction units, which are positioned below glass ceramics.

Of these, only induction-based cooking plates are more efficient than conventional electric hobs. The others mainly offer increased convenience, such as greater ease when cleaning. Most gas cooking stoves place burners on top of a stainless steel or ceramic surface, while others place them on top or beneath a glass ceramic surface. Again, the latter offers increased convenience, but no significant efficiency benefit. [8]

Electric stoveAn electric glass-ceramic cooktop (Source: Wikimedia). Less efficient than a well tended open fire.

Research into the efficiency of modern cooking stoves is rather limited. According to a study by the Dutch research institute VHK, a traditional electric cooktop (with vitro-ceramic plate) has a thermal efficiency of 13%, while that of an electric induction cooker is 15%. A microwave obtains 19% thermal efficiency. Only a classical gas cooking stove (23%) reaches the thermal efficiency of a well-tended three-stone fire. [8] While the study is aimed primarily at the preparation of hot drinks, it is the most complete study available and its results are applicable to cooking food with only a few small caveats. [9]

Now, if we compare the thermal efficiencies from modern cooking stoves with those from stoves used in poorer households, we see that the improved biomass stoves in developing countries beat our "high-tech" cooking technology with a factor of two to three (graphic below). Gas or electric ovens are not included in this comparison, but their efficiency is even lower than gas or electric hobs because water is a much better conductor of heat than air.

The low efficiency of modern cooking devices may surprise people, as these are not the figures that are usually presented in sales brochures or consumer reports. For example, the Californian Consumer Energy Center gives an efficiency level of 90% for an electric induction cooker, 65% for a standard electric range, and 55% for a gas burner. [10]

Power Conversion Losses
The main discrepancy with these figures is caused when one doesn't take into account that electricity first needs to be produced in power plants which sometimes convert less than a third of the primary energy into electricity [11]. This is not an issue with gas or biomass stoves, where a primary fuel is directly converted into heat for cooking. [12] But it does have a destructive effect on the thermal efficiency of any electric cooking device, be it an electric hob or a microwave. In the graphic below, power conversion losses are indicated by the dark blue bars.

The VHK study assumes an electric grid efficiency of 40%. This figure takes into account power generation and distribution losses, as well as fuel extraction and a projected saving on these issues over an average product life of 10-15 years. [8] It should be noted that this percentage corresponds to a global average, including the use of renewables and atomic energy. Depending on the country, grid efficiency can be higher or lower. [13]

Thermal efficiency of modern cooking stovesBoiling water preparation energy impact (kWh primary energy for 1,000 litre useful boiled water per year) for different cooking devices. Dark blue: power generation loss. Light blue: heat loss. Red: theoretical minimum. Pink: production, distribution, end-of-life. Pink: extra boiling time. Purple: standby. Green: over-filling. Source: [8].
If we only look at the different types of thermal power plants, we find that the thermal efficiency for a traditional coal plant (81% of all coal-based power plants in use) is only 25 to 37%, while that of a common direct-combustion biomass power plant is only 20%. [13][14] At world level, the average energy efficiency of thermal power plants is 36%. [13] These percentages should be reduced with electric transmission and distribution losses, which are on average 6% in Europe, 7% in the USA, and 9% on a world level. [13]

This means that if your electric stove is operated by electricity from a biomass power plant -- a fast growing "green" trend nowadays -- the power conversion efficiency is three to four times lower (11-14%) than the authors of the study assume, and thermal efficiency drops to about 5%. This is similar to the thermal efficiency of a neglected open fire, and one-tenth the thermal efficiency of a rocket stove. Likewise, a cookstove which uses coal or gas directly to heat food is much more energy efficient than a cookstove that runs on electricity produced by a coal or gas power plant.

Evidently, there is something wrong with the western approach to sustainability. Converting heat into electricity which is then converted back into heat, at 20-40% efficiency, is similar to building a Rube Goldberg machine; it's a needlessly complex operation compared to simply converting the primary fuel into heat to boil water. Essentially, any electric cooking device is an insult to the science of thermodynamics.

Heat Transfer Loss
A second problem is that the high efficiency figures given in sales brochures and consumer reports underestimate the heat loss that occurs during the heat transfer from cooking stove to cooking pot (shown by the light blue bars in the graphic above). This heat loss is present with all cooking stoves, but is especially high in the case of gas hobs. In the graphic above, the red bar concerns the minimum energy that it takes to boil 1,000 litres of water, assuming that there is no energy loss during the heat transfer between the cooking stove and the water. This value is 105 kWh/yr for a starting cold water temperature of 10 degrees celsius.

Energy losses appear because of three reasons. Firstly, some heat from the cooking fire escapes before it can reach the cooking vessel. Secondly, some heat from the cooking fire is used to heat up the cooking pot, which constantly loses heat to the environment. Lastly, heat is wasted because some of the boiling water escapes through evaporation. While the red bar is logically the same for every cooking device, the light blue bar showing the additional energy required to compensate for heat transfer loss varies from 57 kWh/yr for an electric induction stove to 255 kWh/yr for a gas hob.
Gas stoveGas stoves have the largest heat transfer losses of all modern cooking stoves. Picture: Ashley Bischoff @ Flickr.

Heat transfer loss is not fully accounted for in most testing standards for cooking appliances. For example, the US standard uses a test by which the heat transfer efficiency of a cooking top is established from heating up aluminum cylinders of certain dimensions, not pots of water. [15][16] This avoids the complex phase change from liquid to vapour and is thus better reproducible.

However, as all the heat of the cylinder is counted as useful, it ignores that in real life situations some energy -- notably the energy to heat up the pot or kettle itself -- is wasted. Only taking into account the energy loss in heating the pot itself, energy efficiency decreases with about 10% of the figures given by standard tests, concludes VHK. [8]

Furthermore, the US test is modeled after the process of boiling food on all burners or hot plates simultaneously, which is not always the case. Heat transfer losses are larger when only one or two pots are on the fire.

Three stone fire 3An outdoor three-stone fire. Image: Global Alliance for Clean Cookstoves.

Apart from power conversion losses and heat transfer losses, the remainder of the energy losses are due to production, distribution and disposal of cooking devices (embodied energy), standby losses (which are only relevant for microwaves, induction stoves and sophisticated gas stoves), and cooking habits. These factors have a relatively small influence.

Of all the energy losses involved in modern cooking appliances, only heat transfer loss applies to cooking devices in poorer households. There are no power conversion losses, fuel is mostly gathered by hand, there are no standby losses, and embodied energy is negligible as most devices are home-made.

Indoor Air Pollution in Rich vs. Poor Households
While the thermal efficiency of modern cooking devices is clearly inferior to that of a well-tended three-stone fire or rocket stove, they do have an advantage when it comes to indoor air pollution. However, this is not a black-and-white issue either. Air pollution levels depend on what you're cooking, how skillful you are, and which technology you use.

In the worst case scenario, pollution levels in modern kitchens can be similar to those of a well-tended three-stone fire indoors. This is not to say that the problem of indoor pollution in poor households is overstated, but rather that cooking in modern kitchens is not always as clean as we assume it to be.

Particulate matter (PM) is considered as the single best indicator of potential harm in air quality. [4] In poor households where indoor cooking happens with crude stoves or open fires, PM-levels vary from 200 to 5,000 ug/m3 over a 24-hour period, and from 300 to 20,000 ug/m3 during the actual use of stoves. [17][18][19] The Partnership for Clean Indoor Air measured PM emissions for a well tended three-stone fire, which resulted in values of between 281 and 2,004 ug/m3 while cooking. [4]

Indoor air pollution cookstovesIndoor cooking with biomass stoves. Image: Global Alliance for Clean Cookstoves.

Similar research undertaken in a kitchen equipped with modern technology found PM concentrations in the kitchen, living room and bedroom from below the detection limit to 3,880 ug/m3 during a variety of 32 different cooking tests with gas and electric ranges. [20] The medium and average concentrations of PM during the 32 cooking tests exceeded ambient air quality standards (which are 150 g/m3 for PM10 and 65 ug/m3 for PM2.5). These values come close to the best-case scenarios in poor households.

Importantly, cooking pollutants are not caused by the burning of gas or fuel alone, but also in the cooking process itself. PM2.5 concentrations were over 1,000 ug/m3 during stovetop stir-frying, baking lasagna in the gas oven, and frying tortillas in oil on the range top burner. The authors conclude that:

"Very high levels of several pollutants were measured in indoor air during different types of cooking activities. The levels measured for some cooking activities exceeded health-based standards and guidelines, and could pose a risk to home occupants, especially susceptible groups of the population such as young children and the elderly."

Unfortunately, gas stoves -- which have the highest thermal efficiency of all modern cooking stoves -- produce the most air pollution in modern kitchens. [20] The average indoor PM emissions for gas stoves can amount to 25% of those of biomass cooking stoves. [19] A 2014 study estimates that 60 percent of homes in California that cook at least once a week with a gas stove can reach pollutant levels of CO, NO2 and formaldehyde that would be illegal if found outdoors. [21] The authors state that:


"If these were conditions that were outdoors the EPA (Environmental Protection Agency) would be cracking down. But since it's in people's homes, there's no regulation requiring anyone to fix it. Reducing people's exposure to pollutants from gas stoves should be a public health priority."

Air Pollution and Greenhouse Gas Emissions
Obviously, indoor cooking with an electric stove is the healthiest option, albeit not totally free from producing indoor air pollution. However, electric stoves are only "clean" because they emit most of their pollution elsewhere -- at the smokestacks of the power plant. Any biomass stove design with a chimney basically achieves the same. If a chimney is added to an indoor biomass stove, indoor air pollution drops to almost zero. [4]

Clean cookstoveA clean cookstove in India. Image: Global Alliance for Clean Cookstoves.

And while the burning of coal or gas emits less air pollution and greenhouse gases than the burning of biomass per unit of energy produced [22], you have to burn more fuel in order to make up for the power conversion losses. Especially if your electric stove runs on electricity from a biomass power plant, then air pollution and greenhouse gas emissions are much higher than in the case of a biomass stove.

On the other hand, if we consider biomass to be climate neutral over time because the harvested forest gets a chance to grow back, then a biomass stove beats all other cooking methods when it comes to greenhouse gas emissions. The same goes for the cooking stove powered by electricity from biomass, although it would produce considerably more air pollution than the biomass stove, and require a much larger area of sustainably managed forest.

What's the solution?
When the German Wuppertal Institute investigated the potential for improved energy efficiency of cooking stoves on a global scale, they concluded that energy use could be halved. [2] Although it's remarkable how the proposed solutions for this energy inefficiency differ for poor and rich countries. In the developing world, the focus is mainly on designing more efficient biomass stoves that produce fewer pollutants. While achieved savings as a result of switching to biogas would be larger, its investment would be 30 times higher compared to the distribution of improved wood cooking stoves. [2]
Clean cookstove 2An improved biomass cookstove in India. Source: Global Alliance for Clean Cookstoves.

For the developed world, the Wuppertal Institute focuses on a much more costly measure: extending the use of the most efficient types of "western" stoves, such as the electric induction hob. However, as we have seen, these stoves are far less efficient than the improved biomass stoves, and they are also more expensive. The authors infer that, compared to developing countries, energy saving potentials with modern cooking stoves are far smaller and less cost-efficient. But as is apparent from the inefficiencies of western cooking technology, the energy savings potential is, in reality, larger.

One possibility for the West to improve the sustainability of its cooking stoves, not mentioned by the Wuppertal Institute, is to generate electricity by wind, solar or water energy. If electricity is generated by renewable energy, electric hobs and microwaves suddenly beat all other cooking stoves when it comes to efficiency, air pollution and greenhouse gas emissions. That being said, using renewable energy to produce electricity to create heat for cooking remains a needlessly complex and costly approach to make cooking more sustainable.

There are some obvious but often overlooked solutions that would make cooking close to 100% sustainable in rich and poor countries alike. See our follow-up article: "If we insulate our houses, why not our cooking pots?".


Notes & Sources
[1] "What users can save with energy-efficient cooking stoves and ovens", Oliver Adria and Jan Bethge, October 2013.
[2] "The overall worldwide saving potential from domestic cooking stoves and ovens", Oliver Adria and Jan Bethge, October 2013.
[3] As of 2012, the Partnership for Clean Indoor Air (PCIA) has integrated with the Global Alliance for Clean Cookstoves.
[4] "Test Results of Cook Stove Performance", Partnership for Clean Indoor Air, 2012. See Appendix C for the University of California Berkeley (UCB) Water Boiling Test (WBT) protocols.
[5] "A laboratory comparison of the global warming impact of five major types of biomass cooking stoves", Nordica MacCarthy, 2008
[6] Thermal efficiency rewards the production of excess steam, while specific consumption penalizes it. For the pros and contras of both testing approaches, see [4], page 76-77.
[7] These percentages concern the outer values of different test procedures and during different stages of the cooking process. The thermal efficiency of a rocket stove is especially high when bringing water to boil but its advantage is much smaller during simmering.
[8] "Quooker Energy Analysis", Part one, Van Holsteijn en Kemna B.V. (VHK), March 2010.
[9] The heat transfer efficiency figures chosen by [8] are based on a typical mixed use of cooking stoves, in which the energy is used both for preparing meals and for hot drinks. Since boiling smaller amounts of water for hot drinks is somewhat less efficient, this approach underestimates the heat transfer efficiency of cooking food. However, to be on the safe side, the researchers are rather conservative in their revision of heat transfer efficiencies (see chapters 2.2 & 2.4), so the difference must be small.
[10] "Stoves, Ranges and Ovens", Consumer Energy Center, California Energy Commission.
[11] The average efficiency of a coal plant is 35%. See: "Power generation from coal: Measuring and Reporting Efficiency Performance and CO2 Performance", OECD/IEA, 2010.
[12] It should be noted that the energy losses of the natural gas distribution network can be rather large, and this fact does not seem to be taken into account in the study. The thermal efficiency of gas stoves may thus be overstated. The same goes for the greenhouse gas emissions, mainly due to methane leaks during gas production.
[13] "The state of global energy efficiency: global and sectorial energy efficiency trends", Enerdata.
[14] "How is biomass energy used?", Canadian Centre for Energy Information.
[15] "Test Procedure for Residential Kitchen Ranges and Ovens", US Department of Energy, 1997. For related documents, see "Residential Kitchen Ranges and Ovens".
[16] "Evaluation of Kitchen Cooking Appliance Efficiency Test Procedures", Steven Nabinger, US Department of Commerce, 1999
[17] "Smoke, health and household energy. Volume 1", Liz Bates, 2005.
[18] "The health effects of indoor air pollution exposure in developing countries", WHO, 2002
[19] "health effects of chronic exposure to smoke from biomass fuel burning in rural areas", WHO India, 2007
[20] "Indoor Air Quality: Residential Cooking Exposures", R. Fortmann et al., State of California Air Resources Board, 2001
[21] "Pollutant exposures from natural gas cooking burners: a simulation-based assessment for southern california", Environmental Health Perspectives, January 2014.
[22] "Trees, Trash, and Toxics: How Biomass Energy Has Become the New Coal", Mary . Booth, Partnership for Policy Integrity, April 2014

See also:
http://www.lowtechmagazine.com/2014/07/cooking-pot-insulation-key-to-sustainable-cooking.html

.

Solars Oven - Part Three

SUBHEAD: The final in a series on choosing and making you own solar cooking oven.

 By Juan Wilson on 26 may 2011 for Island Breath -
  (http://islandbreath.blogspot.com/2011/05/solar-oven-part-three.html)
Image above: Prototype by with solar reflectors and a yellow plastic lid to pivot the oven into the sun. All photos by Juan Wilson.

At the end of Part -2 of this series on solar ovens I had completed making an insulated box with a tempered glass insulated window to the sun. It got warm and held heat, but did not do enough of either. Top air temperature in the oven was about 160º. The temperature was measured with a oven thermometer from Big Save supermarket ($5). I realized that I would need to reflect more light as well as absorb more heat into my prototype A solar oven for it to actually cook food.

 Prototype B
Prototype B was different from A in three significant ways.  
First: I removed the tempered insulated glass window I had found on a small beverage refrigerator. It was not totally clear glass and simply filtered out too much sunlight; perhaps as much as 20%. I replaced it with a single sheet of 1/8" thick clear tempered glass from an interior refrigerator shelf I found amongst the recycled appliances at the Kauai County Hanapepe Transfer Station.

 Second: I chose to spray the raw pine boards with black paint. Originally I was concerned that a painted surface that got heated to several hundred degrees would off-gas chemicals that could "flavor" food in the oven. I selected a spray paint I thought might work. Ace hardware has a line of "Rust Stop" spraycan paints. One called 'Barbeque Black 1000º F" is designed for barbeque grills, cast iron stove and fireplace equipment. It claims to withstand 1000º fahrenheit temperature.


Third: I added reflectors to the sides and top of the mouth of the oven. These reflectors would have been made out of polished mirrored aluminum sheet if I could have afforded it. I found a source (http://www.anomet.com/reflective_aluminum.html) that would sell 24"x48" single sheets of 97% reflective aluminum, but the cost of getting two sheets to Kauai was about $200. You can buy a commercial solar oven for that much. Instead I chose to try a role of 12" wide aluminum flashing.

A 50 foot roll was over $30. The flashing needed to lay flat as well as have some stiffness and protection. I selected to use thin clear plexiglas. Both the flashing and plex were available as the Eleele Ace hardware. I cut the aluminum flashing with shears into 12" tall trapazoids. The angle on the acute corners of the trapazoid I used was 69º.

 I used a matte-knife (box-cutter) to cut the plex with a 1/2" over hang on the outer edges. This protected the flashing edges as well as my fingers. I drilled holes to line up the pieces and used stainless steel bolts, nuts and washers to assemble the reflector panels. small hinges were used to allow them to fold back against the body of he oven when not in use. When the panels were "up" I kept them secure with brocolli rubberbands over the extra long bolts at the trapazoid corners. Then wind was never a problem.

Finally, I bought a auto windshield heat reflector. This I cut to size to cover the tempered glass. When the sun was not shining or too low in the afternoon sky the plan was to place the heat reflector over the glass shiny side down to keep heat in the oven. I also added a bright yellow plastic screw-on-lid for a 5 gallon to the bottom of the oven to allow for sliding and rotating it easily on something as rough as plywood. Its about 12" in diameter and quite strong with little surface area to create friction.


For a test I of Prototype B we chose to try our black wrought iron 10" Dutch oven on top of a 6"x6"x4" cement block. The block hoisted the Dutch oven to a good height and would help hold heat when there was no sun. On February 3rd, a clear bright day, I tested this configuration. In the sun the Dutch oven quickly got very hot to the touch. Between noon and four o'clock this configuration averaged about 250ºF with a peak of 260º from 3-4pm. At this time I folded back the aluminum reflectors and applied the windshield reflector to hold heat. The box kept the temperature over 200º past 5pm. At 6pm the temerature was 175º. At 7:30 it was 145º. This was still warm enough to serve as a hot meal. As much of an improvement as Prototype B was it was not hot enough to cook food the way I wanted it.  

Prototype C
 Prototype C was different from B in three significant ways.  

First: I replaced the tempered glass with two sheets of thin window glass (from Home Depot). I cut these to size for my oven mouth. I also cot a 1/2" wide aluminum channel and mitered a square frame. I silicone glued the glass to both sides of the frame creating an insulated panel. This would hold in heat better.  

Second: I would try a reflective surface inside the oven rather than a matte black surface I had sprayed on. I did this because I figured that although the black did absorb heat to keep the oven warm in when it was cloudy, it might be stealing heat that could be applied directly to cooking. I figured that if the inside was reflective it might actually focus more solar energy on the cookware sides and back. I made the sides reflective by screwing some of the remaining aluminum flashing cut to the profile of the side walls. The top back and front was a long curved section that looped from top to back to front.  

Third: This version would have to have a more reflective surface than aluminum flashing. The plan was to use the configuration of the reflectors previously mentioned in Part -1 from (http://www.omick.net/solar_ovens/current_solar_oven.htm). That solar oven used four mirrors at a precise angle relative to the oven mouth opening and the length of the mirror. The formula is: Where "A" is the oven mouth (distance between mirrors and we'll assume it's square) and "B" is the length of the mirror (from oven to sky and all the same). Mirror Angle = 90° + [sinˉ1 x {-(B÷(4 x A)) + (0.25 x √((B² ÷ A²) + 8))}] I tried calling around the island to get some mirror glass cut to size. Not many people do it and I found it was almost as expensive as the mirrored aluminum. The alternative was to find existing mirrors. I found what I needed at Habitat for Humanity's thift Restore in Hanapepe. I bought four cheap medicine cabinets for $40 with 15"x22"glass mirrors. So . Example: oven mouth width (A) = 16”x16" reflector length (B) = 22”
Angle = 90° + [sinˉ1 x {-(22÷(4 x 16)) + (0.25 x √(22² ÷ 16²) + 8))}] Angle = 90° + [sinˉ1 x {-(22÷64) + (0.25 x √((484 ÷ 256) + 8))}] Angle = 90° + [sinˉ1 x {-0.343 + (0.25 x √(1.375 + 8))}] Angle = 90° + [sinˉ1 x {-0.343 + (0.25 x 3.0619)}] Angle = 90° + [sinˉ1 x {-0.343 + .7654}] Angle = 90° + [sinˉ1 x 0.422475] Angle = 90° + 25º Angle = 115º
This would be the angle between the glass covering the mouth of the oven and the mirror. To gather enough solar energy the space needed with the mirrors in place this solar oven would be enormous.mirrors would have to fold down or be removable. After cutting them out of the plastic cabinets I framed them in wood with plywood backing. What was needed a system for holding them rigid in the wind that would allow for quick dismounting. I decided to used metal shelf brackets. They consist of two parts. A metal C shaped steel channel with slits separated by a inch and a bracket that wedges into the slits and can support a heavy shelf of books. The channels and the brackets can easily be custom but with a hacksaw.


 I used 1"x3" trim screwed with angles to the body of the oven. the top of the 1"x3" was cut to the angle derived from the formula above. The metal shelf brackets were bolted to the 1"x3" at that angle. Finally, a length of the shelving channel was screwed and glued to the plywood backing and frame holding the mirror.

The results were that the mirrors could be securely fastened in seconds to the mounting brackets, and just as quickly removed. These panels seemed impervious to the wind, however if they were grabbed and pulled the wrong way they could get dislodged. I eventually broke a mirror accidentally dropping it off my deck.


 I decided to paint the mounts and mirror frame with colors of some hibiscus that bloom in our yard.


On March 20th, a day with intermittent clouds until 1:45pm, I tested this configuration. Below, is a full view of our solar oven set up and ready to go. At 2:00pm the oven passed the 260ºF achieved by Prototype B and broke 300ºF before 3pm. At 3:30 there were some puffy clouds and the oven temp peaked at 330ºF. At that point the inner glass pane on the insulated panel cracked: too much difference in expansion inside to outside. Needless to say this unit does not turn itself to follow the sun.

You have to do that yourself. Some people advise that you set the unit a little ahead of the sun. This allows you to have the sun center up on the unit while your away and be just a little behind when you return. I work at home and our solar oven is on the deck outside my office. I can keep an eye on it. So I change the rotation position of it about every 20 minutes. Performance will certainly drop off if you leave it for an hour, especially in the middle of the day when the sun is tacking across the sky the fastest. In the late afternoon you can almost leave it alone.


Conclusions I did several tests cooking with this unit with only the outer glass on the panel. The results were marginally good. I found I could set the oven up for two tasks for the day. A less ambitious one before midday and something more demanding in afternoon. One reason for this is because in the morning the oven is cold. It takes time to get it up to operating temperature.

A few hours are lost before the oven is at high temperature. Moreover, our days are not very symmetrical around the sun. Most of us usually get up after dawn and stay up long after sunset. Consequently, were are not ready to load the oven with our dinner-to-be-cooked until long after breakfast. If you remember from Part - 2 we chose to angle the face of our oven for maximum performance in the winter and in the morning/afternoon hours.

This means that between the cold morning oven and a late start the morning session is not near the performance of the afternoon. One use I have found for the morning session is something simple like toasting pumpkin seeds on a tray with a little schmear of olive oil and a sprinkle of salt. It makes a good afternoon snack or appetizer for dinner. After midday I reload the oven with the big job for the day - making dinner. The example below was a casserole in a Mexican nacho style. There are chopped chayote drizzled with olive oil, salsa, corn chips, shredded cheddar cheese, diced tomatoes and onions with some sliced black olives on top.


The cheese melted quite quickly with the oven in the 225ºF range. By 3pm the moister in the casserole was bubbling and the cheese browning slightly around the edge. This arrangement can coast on through the afternoon and keep the meal hot until after dark when you need it. When your done the aluminum flashing interior is easy to wipe clean if there has been a spill. The mirrors can be stowed between the brackets. It's a good idea to have a vinyl cover or small plastic tablecloth to cover it up. This will keep the rain off, keeping the inside nice and dry.


A final note - If I were to do this oven over again I would provide a tilt-back shape to the bottom rear of the unit so it could be pointed up to the midday sun between about 10:45am and 1:15pm. This would be just two vertical adjustments in the day. One must also remember that a solar oven temperature of 330º is not the same as a flame under a pan. That temperature is air temp. As you have probably discovered - a tiny match that's lit and above your hand feels a lot different than one below your hand. One you won't feel - the other will char your flesh.

 See also:
Ea O Ka Aina: Solar Ovens - Part One 5/13/11 
 Ea O Ka Aina: Solar Ovens - Part Two 5/18/11 .

Solar Ovens - Part Two

SUBHEAD: Experience of building first solar oven in Hanapepe in February 2011. Needs more work.  

By Juan Wilson on 18 May 2011 for Island Breath -  
(http://islandbreath.blogspot.com/2011/05/solar-ovens-part-two.html)


Image above: Prototype A. Greenhouse style solar oven in action. All photos by Juan Wilson.

 As mentioned in Part One of this series, my goal was to build an insulated container that could be heated by solar radiation and hold that heat to provide slow cooking like a crock-pot. I wanted an oven that would last many seasons in a variety of weather conditions - this drove me away from using cardboard and aluminum foil construction material, even though the expense would be minimal and the the construction more complicated than just using a boxcutter and duct-tape. it also would make the oven heavier and bulkier.

The "heavier-and-bulkier" aspect was part of the reason I chose to build an oven that would only require horizontal rotation to follow the sun, and not have vertical adjustment as well. This was a major decision. It would make the oven less efficient at some period of the day, but make its construction and operation easier. If the unit was to have a fixed vertical angle to the sun, what should that angle be on Kauai? For the highest yield of solar energy the conventional rough rule of thumb was to set the angle of the opening equal to your latitude.

In other words, here in Hanapepe Valley that would be 22º above horizontal. The problem with this angle is that it is set to perform best at noon when the sun is highest in the sky. you get the most sun then but that angle will perform very badly early in the day (and more importantly), later in the day. It will also perform better in the summer than in the winter. Another criteria is to set the fixed angle of the solar oven opening to the sun at a pitch that will collect the most energy throughout the day as well as throughout the year. That ends up with quite a different result.

My conclusion was that is particularly true if when you want a hot cooked meal most is in the evening, in the winter. I looked to maximize first the winter performance. I found a site that suggested seasonal optimum orientation of solar voltaic panels (http://www.macslab.com/optsolar.html) with tables for various situations. it stated:

Optimum Tilt for Winter

The winter season has the least sun, so you want to make the most of it. To calculate the best angle of tilt in the winter, take your latitude, multiply by 0.89, and add 24 degrees. The result is the angle from the horizontal at which the panel should be tilted. This table gives the angle for some latitudes:

Latitude Angle % of optimum
25° (Key West, Taipei) 46.3° 81%
30° (Houston, Cairo) 50.7° 82%
35° (Albuquerque, Tokyo) 55.15° 84%
40° (Denver, Madrid) 59.6° 85%
45° (Minneapolis, Milano) 64.1° 86%
50° (Winnipeg, Prague) 68.5° 88%

For Kauai that formula results in an angle of 44º. For simplicity of cutting parts to fir I adjusted that angle of the opening to 45º. This would maximize performance for mid to late afternoon when it is most likely I would be cooking. My tools, and readily available material at hand, guided me towards constructing a solar oven made of wood. I had read of problems people had with the taste of food when plastics (and some paints) were used inside the heated space of the oven. Initially decided to build a pine board box as the inner enclosure of the solar oven.

The Ace Hardware a mile away had pine boards for use as shelves. They come in a variety of sizes. I determined I needed a couple of 1"x8"x8' and a 1"x12"x4'. Pine boards for this purpose are plumb and true. With a little effort boards with no knot holes, warps, or major imperfections can be selected. My plan was to make an oven enclosure of about 14"x14"x14".

This was in part because of the size of the pine boards. It also would comfortably fit our black cast-iron "Dutch" oven pot. I like to use a portable electric drill and philip-head screws to put such projects together. Unlike hammering, which can be quite violent to a small job, using screws can allow you to "undo" a bad connection. Once a nail head is buried it can be a mess to retrieve it.


Image above: Pine board oven liner (14"x14"x14") held together with 1"x3" strips cut to 21". 

Because I was building an insulated box I needed to connect the pine boards and provide separation between the inner oven and the outer "skin". I used 1.5" recessed philip-head screws. I used 1"x3"x8' douglas fir lumber all cut to length of about 21". these would both hold together the pine boards as well as separate them from the outer skin (for the insulation space) and provide the structural support for that skin.

That outer skin was 3/8" plywood. It was also screwed into the 1"x3" framing. The resulting squareness and accuracy of the outer skin was highly dependent on how true the pine and fir were assembled. I covered the outside joints of the pine boards with 1/4"x1" furring strips. The 1"x3" framing was laid out to make it easy to insulate the oven with a roll of 3" batt fiberglass. This material is cheap and easy to cut to size. Thinner and better performing material are available as well. As I was closing up the outer skin of the oven I stapled the paper of the insulation to the box.


Image above: Plywood oven skin screwed into 1"x3" framing. Note installed batt insulation on left and right walls.

 I needed an insulated window for the open face of my oven. At the Hanapepe Transfer station I found an recycled small beverage refrigerator with a insulated two pane tempered glass door with rubberized seal. I removed the door from the unit and brought it home. This was my "Prototype A" solar oven. Itwas finished in late January of 2011.  

Prototype A
On February 1st 2011 I tested the oven. See photo at top. It began sunny, but turned to occasional clouds between 9:30 and 11:00am. After an hour and a half my oven thermometer never got above 165º... not enough to warm a muffin. This oven worked miserably. I quickly learned three things
  • This particular insulated tempered glass filtered out too much light.
  • The raw pine boards neither absorbed and held heat, or reflected it on the target.
  • The oven opening was not gathering enough light. it needed relecttors.
Prototype B and C 
quickly followed. 

See part three of this series on solar ovens. 

See also:  
Ea O Ka Aina: Solar Ovens - Part One 5/13/11 
Ea O Ka Aina: Solar Ovens - Part Three 5/26/11

  .

Solar Ovens - Part One

SUBHEAD: There are many kinds of solar ovens. Selecting one is determined by your purposes in having it.  

By Juan Wilson on 13 May 2011 for Island Breath -  
(http://islandbreath.blogspot.com/2011/05/solar-ovens-part-one.html)

 
Image above: Greenhouse style solar oven prototype built from scratch codenamed "Hibiscus". Photo by Juan Wilson.

Around the beginning of the year I became interested in building a solar cooker. I was inspired by two articles posted by John Michael Greer at the end of 2010 in the ArchDruid Report.

The Haybox Factor
(http://islandbreath.blogspot.com/2010/12/haybox-factor.html)  

The Tarpaper Shack Principle
(http://islandbreath.blogspot.com/2011/01/tarpaper-shack-prnciple.html)
The first was a way of slow cooking in an insulated box after heating the cooking vessel on a stove, and the other was about using the direct radiation of the sun to cook food in a box heat trap. My reaction was to build a two-in-one haybox/solar-oven. Specifically, the goal was to build an insulated container that could be heated by solar radiation and hold that heat to provide slow cooking like a crock-pot. I knew going in that this was an experiment and that there would likely be missteps along the way. It would be more sensible to simply buy a commercially manufactured solar oven and try and insulate it or, on the other hand, buy a crock-pot and run it off an inverter off a battery fed by a couple of solar panels. As it turned out those alternatives would have been in the first case cheaper, in the other more effective. None the less the unit I built does to an extent work. It took three major overhauls and several minor modifications to get it to where it is today. along the way I learned a lot - so much that I really need to re-build the unit from scratch. But more on that later.  

Crucible or Greenhouse
If you are considering building (or buying) a solar oven there are two major types that are quite different. In one case the sunlight is trapped in an enclosure with a "Greenhouse" effect. Often flat reflective surfaces are used to multiply the effect of the sun. In the other case curved (parabolic) reflective surfaces focus sunlight in a "Crucible". Today when I searched YouTube for "How to build solar oven" I go 545 matches (http://www.youtube.com/results?search_query=how+to+build+solar+oven).

You can build a parabolic reflector "crucible" that will focus sunlight on a small area and cook food like you might fry an ant with a magnifying glass.

These cookers are effective generating high temperature in a small space. It's like cooking over a very small hot charcoal grill. The materials for highly reflective curved surfaces is quite expensive. The temperatures achieved will set lumber on fire in short order. Even a short period of bright sun can grill meat, however, cleanup can be difficult.  

Example of Crucible  
Video above: Grilled cheese sandwich in a minute over parabolic mirror. From (http://www.youtube.com/watch?v=aJ22QCAqFCc).

You can build a flat reflector "greenhouse" that will capture sunlight ins a cooking space like melting ice-cream in a closed car in the sun. These cookers are effective in holding medium temperature in a large space. It's like cooking in an oven set to 250º. The materials can be as cheap as tinfoil and cardboard. The temperatures achieved make it hard to boil water unless the sun is bright an the unit efficient. It will take hours to cook a casserole or soup. It is best to use glass mirrors to multiply light into the box.  

Example of Greenhouse  
Video above: Baking potatoes with tinfoil and glass in a box. From (http://www.youtube.com/watch?v=tt1DgZp0n2g).  

For a wider spectrum of cooking options you might build a Crucible and a Greenhouse. That is what what one women did with tinfoil and cardboard.

 A Bit of Both

 
Video above: Cooking vegetables in the Greenhouse and meat in the Crucible. From (http://www.youtube.com/watch?v=8JOSGSGM0KA&NR).

The biggest short coming (besides efficiency) is what happens if it rains. Both the Crucible and Greenhouse solar ovens tend to be bulky and large. They will likely spend a lot of time outdoors, and need to be weatherproof to get through a year. I chose to build a Greenhouse oven. With these types of ovens you need to plan several hours in advance when preparing a meal. Those of you who have had crock-pots know the drill. You have to know before you go to work what you want for dinner - and do something about it.


 Image above: Demonstration of how to build high performance Greenhouse oven. From (http://www.omick.net/solar_ovens
/current_solar_oven.htm).

 The link above is an example of a high performance Greenhouse solar oven that is rugged and high performing (400ºF). I think it's about the best design for a do-it-yourselfer I've found, although it's quite a bit of work to construct. I used some of what these folks learned in making my solar oven.

But, before you try and make your own oven, look at some of the commercial products out there. Commercial Products There are many commercial solar ovens available online. One of sites with the widest selection is www.solarovens.net. They have have many videos of products in action. Here's a video of a commercial parabolic oven that is available for about $700.


Video above: A high performance parabolic "Crucible" oven. From (http://www.youtube.com/watch?v=yzbKXZQeTTA).

Here's a video of a popular reflector box oven that is available for about $200.
 
Video above: Demonstration of popular "Greenhouse" style Sun Oven product. From 
(http://www.youtube.com/watch?v=VKPlrVLtgxM).

In Part Two of this series I will detail building my first "Greenhouse" solar oven and its performance.
Ea O Ka Aina: Solar Ovens - Part Two 5/18/11
Ea O Ka Aina: Solar Ovens - Part Three 5/26/11

 .

Biochar - The Real El Dorado

SUBHEAD: We, the fire people, have to make coal and bury it, reversing the past 500 years since the start of the Industrial Revolution.  

By Albert Bates on 3 March 2011 in The Great Change -
  (http://peaksurfer.blogspot.com/2011/03/real-el-dorado.html)


Image above: Screenshot from the game "The road to El Dorado". From (http://pc.ign.com/dor/objects/14685/gold-and-glory-the-road-to-el-dorado/images/eldorado003.html).


Resiliency demands something quite different than specialization and diligent professionalism. Resiliency calls for an equally amazing and profound rise in competence on the part of citizens, consumers, eccentrics, dissenters, minorities... in other words, the generalist talents of amateurs.

 David Brin, Essences, Orcs and Civilization (2007)


[Author's note: We occasionally write for Terra Nuova, the Italian environmental/alternative living magazine, and we were recently interviewed by one of their writers who lives in Spain. Here is the original interview, conducted February 24, 2011, in English.]

TN: Saludos de Espana, Albert….

AB: Saludos, Simon, and if you have any contact with Spanish publishers I would love to find one to translate and publish The Biochar Solution. Here in México there is great demand for a Spanish edition. Same goes for the Post-Petroleum Cookbook. Terra Nuova arranged a contact for us with EcoHabitar in 2007 but then came the crash of Madrid banks and the publishing loans stopped and the book project aborted. I need a Spanish publisher!

At least Terra Nuova is bringing out The Biochar Solution in Italian, the way they did for the Post-Petroleum Cookbook.

TN: How do you see biochar integrating into small, sustainable farms in countries with heavily industrialized agricultural systems like Italy?

AB: Biochar has application to both small scale and large commercial operations, but I see the future as one of the smallholder coming to predominate. There are many reasons for the shift but the two largest drivers will be Peak Oil and Climate Change. Industrial agriculture will attempt to fight against the onslaught of astronomically high fuel prices and unpredictable and catastrophic weather, using GMO seeds, government subsidies, and hi-tech machines, but Big Agriculture will be at a gradually increasing competitive disadvantage to small farmsteads and backyard growers who can substitute labor in the form of tender loving care and watering.

 Big Ag is stuck with highly-capitalized, hydrocarbon-intensive and wasteful mechanization and a chemical dependency that would make William S. Burroughs blush. With steadily declining returns eating up their profit margins, I don’t know where they will find bankers willing to finance them.

Biochar, as one part of the natural, organic style of farming, is symbolic of the advantage that small growers will have, because it can be produced at any scale, works best if used in combination with compost and compost teas, and produces dramatic results almost immediately. Another competitive advantage is the "Facebook Revolution" that is now toppling dictators in the Middle East.

Small growers can take away the large market advantage held by Big Agriculture by using local food cyber-cooperatives and groceries-by-subscription. Biochar production will probably follow that same path, being small and local in production (on-farm is best) rather than bagged and sold in WalMart or Tesco.

TN: Do we have time, climate-wise, to do in-depth field research and testing on biochar before applying it on a large scale?

AB: Fortunately, plenty of the in-depth field research and testing has already been done — at least all the most critical parts. We know enough to say with confidence that, provided it can go through some kind of quality control, biochar is (a) safe and (b) effective. Remaining research primarily is about optimization, and that will evolve with time. Biochar can be used safely and profitably now, at any scale we can imagine.

The standards being developed by the International Biochar Initiative, in a global, transparent, scientifically-based process, will help bridge the remaining gap to assure commercial product quality, define acceptable feedstocks, and provide uniform chemical and physical properties tests to be applied by governmental and third-party certification agencies. Disclaimer: I am on the board of the US Biochar Initiative so my views of the importance of this work may be somewhat prejudiced.

TN: How does biochar fit into food sovereignty of developing nations? Will its uptake tend to encourage small, diversified farms or large, monocultures in these countries, and why?

AB: One of the great pieces of scientific research undertaken in recent years was the economic analysis of big and global versus small and local in the production and use of biochar.

The results were surprising to many, not the least the university researchers who are mainly funded by Big Ag. What they found by doing sensitivity analysis of the bottom line is something permaculturists have known for a long time. We call it "stacked function."

If a large central facility hauls biomass in from a great distance, using big trucks, big grinders, a drying and curing stage, and then a multi-story pyrolysis kiln, it can produce massive amounts of biochar, which then has to be packaged and transported to distant farms and gardens. All of that is extraordinarily capital, energy and fuels intensive, and the process heat is usually just wasted in the manufacturing, adding to global warming.

Alternatively, a small- to medium-sized farmer (a good example is Thomas Harttung in Denmark) might produce biochar from farm wastes like chicken manure, straw, corn stover, etc. in a kiln inside a greenhouse. None of the heat is wasted. It warms the areas being used to produce vegetables in winter, or to heat the animal barns. In summer it might run a Stirling engine and make electricity, or a heat engine to pump water. All of these energy services represent profits to the farmer that are in addition to the production of biochar. Because it is produced on site, the distances traveled to bring feedstocks and send soil amendments is very short and can even be done with human and animal labor.

The government of Senegal now has an interior Ministry of Ecovillages, with a goal of converting 10,000 traditional rural villages to model African ecovillages within the next decade or so. Two aspects of this work will be energy and soil fertility, the two sides of the biochar coin. One can easily imagine a village that harvests vetiver grass or moringa branches to pelletize into fuel for smokeless stoves of the type being built in village-scale kit micro-factories like WorldStove’s.

The villagers cook their food efficiently, make biochar instead of smoke and ashes, and then put the biochar into their composting toilets. The carbon-rich humanure goes to tree-planters or to areas where more vetiver is being sown. This is a model that exemplifies both full-cycle carbon-negative living and sustainable village development in the best sense intended by the UN’s Clean Development Mechanism.


TN: Taking local and regional ‘resilience’ (in the Transition movements sense of the word) as paramount, where does biochar fit into resilient food and energy systems?

AB: One of the characteristics of the terminal phase of the Anthropocene, which we are now entering, is volatility. Certainly we see that in climate, as we leave the extraordinarily tranquil Holocene, with 10000 years of amazing weather stability (caused at least in part, I would argue, by the ethical land care practices of indigenous peoples) and enter a period of wayward monsoons, super-hurricanes, historic droughts and other calamities.

We see it also in the end of the fossil fuel era, beginning with petroleum but quickly following with depletion of natural gas and coal. That expanding collapse has been responsible for both the reversals in our financial markets and the civil turmoil we are seeing around the world, from Tunisia to Wisconsin, although it is masked by the long-simmering inequalities and repression that set the conditions for the crisis to boil over.

Well, what does 'resilient' mean? It means the ability to buffer the storm; the capacity to take a hit and then stand back up. I am famous for saying that the time to mend sail is not in the heart of the gale. Now, while times are still relatively calm, is the time to be building stores in preparation for what is coming. In the case of biochar, we are building the health and fertility of our soils, which is better than any money in the bank. It will continue to give us food when all around us plants are shrivelling in the heat or waterlogged by flood.

It will supply us carbon-negative heat and energy (soothing Gaia's fever to restore her tranquil nature) and keep our houses moderated and well lit when air conditioning and fuel oil become nearly unaffordable. Carbon farming in the broader sense (including not just biochar but no-till organic, keyline management, holistic grazing, compost teas and agroforestry) will provide us something that no amount of military expenditures can: security.

TN: What can people do to help spread the production and use of biochar?

AB: The best way to begin is by having some char on hand somewhere between your kitchen and your compost pile. In Tennessee I make most of my biochar in the winter, when I am running a woodstove. I have a small metal insert that I fill with wood scraps or bamboo (I grow a lot of bamboo) and I save a pile of that that I can use every time I take out my compostable kitchen scraps. In México I get my “carbon” from the local Mayan tradespeople who make it the traditional way that I describe in my book.

I open a hole in my compost pile, put in the char (if it is already pulverized, otherwise I bag it and pound it with a mallet first), and then put in the fresh kitchen scraps. Then I turn it all into the pile, mixing it well in the process. With a little luck, earthworms will digest both the biochar powder and the compost together, making a wonderful worm-casting that is ideal for the garden.

The next best way is to buy a case of my book, The Biochar Solution, and give one to each of your friends.

TN: How important is biochar to tackling climate change in any significant way?

AB: I am fond of reminding people that carbon is stored in only 4 possible places: Earth -- both the topsoil and the deeper parts, including oil fields and coal mines; Air -- the atmosphere; Water -- oceans, lakes, rivers and ice; and Fire -- us! the living, moving, breathing parts, including all the plants, trees, algae, fish, birds, animals, bacteria and people. The problem of climate change is that Gaia has become unbalanced by human activity, and so too much carbon (and other elements) have been taken out of the Earth and put into the Air.

Air said, "Whoa. I can't handle that" and passed it to Water. Water now has so much it has become poisoned with carbolic acid and the corals are bleaching and the shellfish are dissolving, so it is trying to send it back to Air. Where it belongs is back in Earth.

The way to get it back into Earth is through Fire, much the same way it came out. We, the fire people, have to make coal and bury it, reversing the past 500 years since the start of the Industrial Revolution. The good news is, once we start doing this we discover we actually can make more and better food that way. Our soils grow deeper and darker with each passing year. This was no secret to the makers of terra preta in the Amazon, who grew their food this way for 8000 years, but we are only just rediscovering this ancient wisdom.

The amount of excess carbon being held by the atmosphere each year is 3.2 gigatonnes. This raises the concentration somewhere between one and two parts per million each year. Bill McKibben has said, "Civilization is what grows up in the margins of leisure and security provided by a workable relationship with the natural world. That margin won't exist, at least not for long, as long as we remain on the wrong side of 350."

By that he means we need to get back to 350 parts per million. This year we will cross over 390 parts per million, about the same time we cross over into 7 billion humans, this season’s people. So the problem is certainly to reduce the number of humans, hopefully gracefully, but then to bring down that excess carbon below 3.2 GtC net.

Advocates of carbon farming, such as the switch to organic farming advocated by Vandana Shiva, Michael Pollan and others, put the potential at around 1 GtC/yr. IBI scientists say biochar’s potential is 4-10 GtC/yr, because you can incentivize the use beyond the immediate food payback, such as through clean stove programs. However, the really big gorilla, in terms of fast sequestration, is tree planting, which I have estimated to have an 80 GtC/yr potential, once you start re-greening some of the major deserts of the world.

All three of these strategies, working in conjunction, provide a path to restore the carbon balance in both the atmosphere and the ocean, on decadal timeframes, before the worst tipping points can kick in and send us screaming towards the climate of Venus, something none of us wants.

There are those who will naturally oppose this sort of large-scale tampering, calling it "geo-engineering," "the next market bubble," or other epithets. My feeling is that the ship has already sailed; farmers already know about the benefits and will begin using biochar anyway, and whether there is a market bubble or dangerous climate interference it will not be much different, although probably better, than what is happening right now. What we are doing, after all, is re-creating conditions that existed in the New World before the encounters by Zheng He, Columbus and Pizarro. In the case of Europe, we are bringing home, finally, the real gold of El Dorado.

 .