SUBHEAD: There are several styles of no-dig gardening, including straw bale gardening.
By Linda Ly on 5 March 2014 for Garden Betty -
(http://www.gardenbetty.com/2014/03/the-no-dig-vegetable-garden/)

Image above: Claw foot porcelain tub planter. From original article).
[IB Publisher note: This article wasn't posted for the cute claw footed tub, but for the thin, efficient, economic soil recipe that is described using mostly straw, alfalfa and newspaper.]
I started a new garden bed last fall, and I didn’t dig a thing. It actually would’ve been pretty challenging to dig anything, as I started the new bed in an old bathtub. In my backyard! Four months later, the first plants seeded are finally thriving, thanks to the longer days.
I inherited this vintage, enameled-steel clawfoot tub from the previous owners after I moved into my house a few years ago. They had it propped up under the feijoa tree on a stack of stones, and for many summers it was our repurposed party cooler, filled to the brim with ice and stuffed with cases of beer. But having the tub sit empty the rest of the year seemed silly, especially since we weren’t using it as an actual tub to wash anything in the garden.
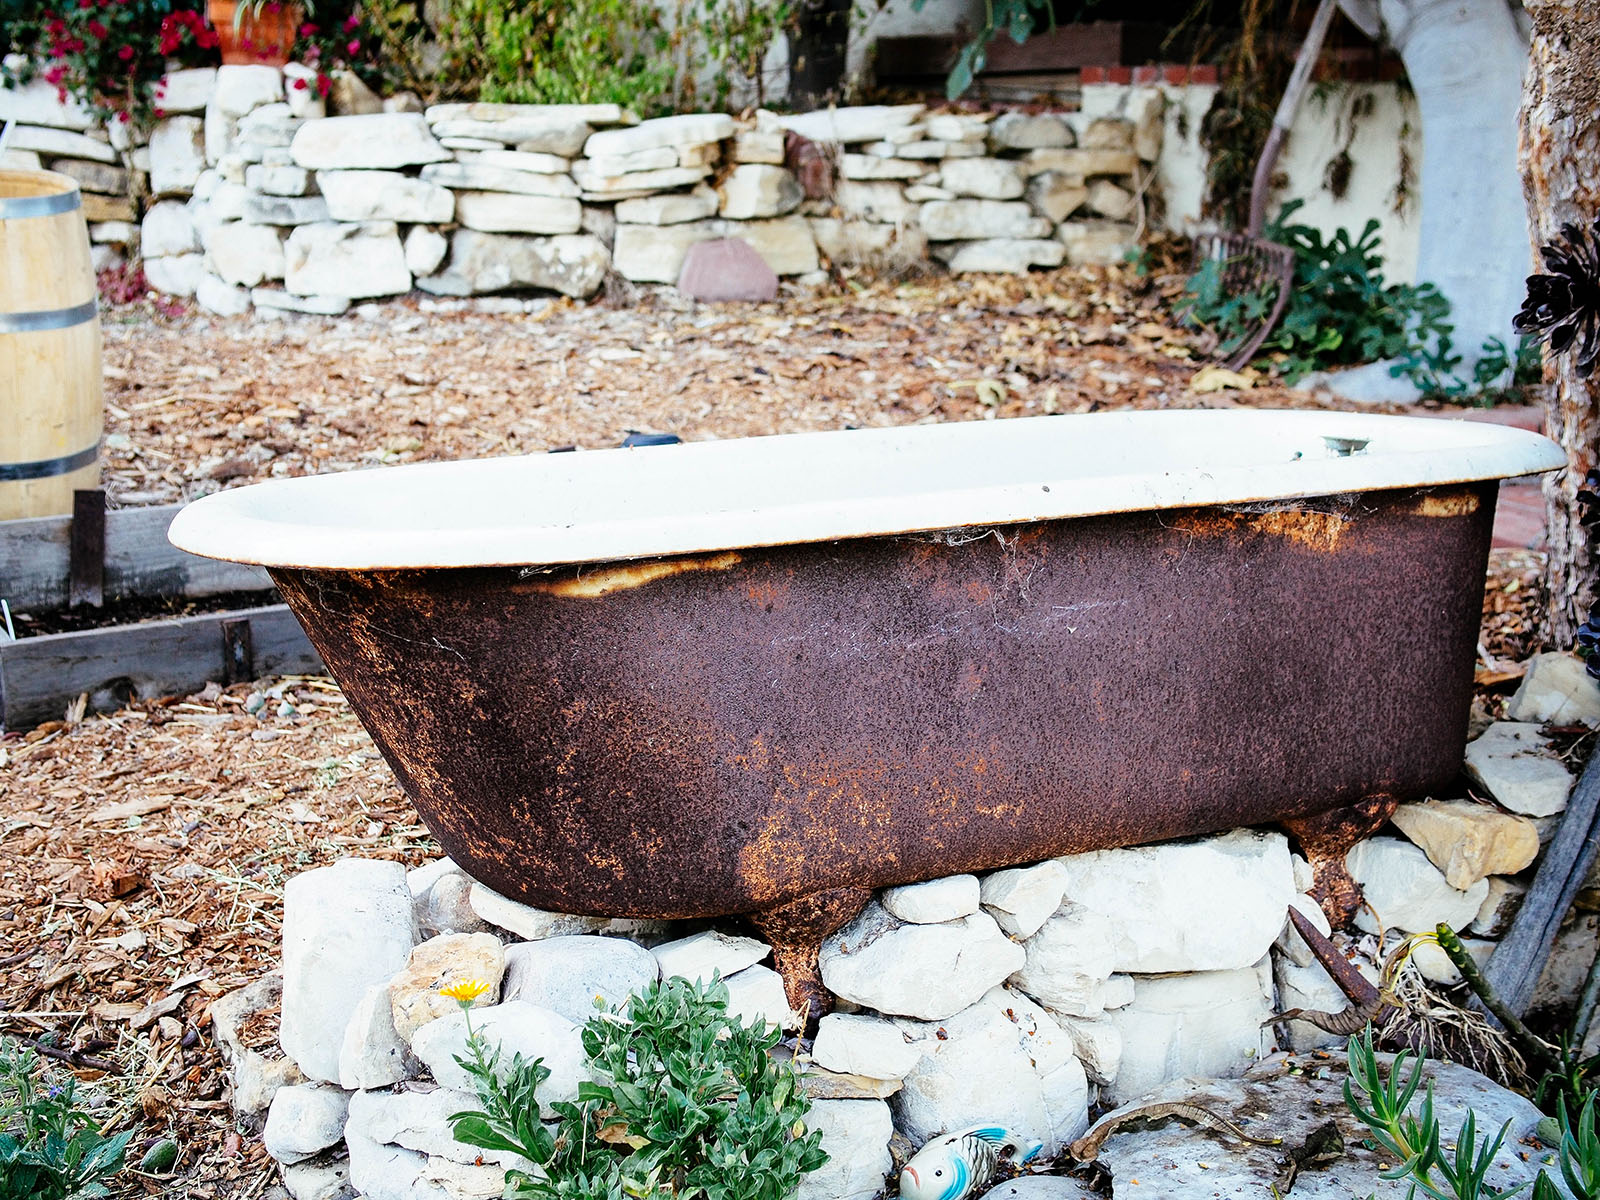
Image above: Rusty clawfoot porcelain iron tub.
I envisioned turning it into a planter (especially a future planter for potatoes and sweet potatoes, where the tubers could be contained), but the massive size made filling it with good-quality soil a little cost-prohibitive, considering we needed to top off all our existing beds as well. I started looking into no-dig methods for building raised beds, which pile on layers of organic materials that decompose over a season to create humus-rich earth.
There are several styles of no-dig gardening, including straw bale gardening, lasagna gardening, and sheet mulching, but I was most intrigued with Esther Deans’ method, which appeared suspiciously simple. The Australian gardener and author promoted a style of no-dig gardening (you can still find her book online) that popularized no-dig gardens throughout the 70s and 80s, and inspired the ideas of permaculture designer Bill Mollison.
Deans’ method comprised a specific formula that started with newspaper and added fertilizer, alfalfa, straw, and finally compost. The layers could be built over a soft surface like grass or dirt — or even a hard surface like concrete, though the raised bed would have to be deep enough for deep-rooted vegetables to thrive.
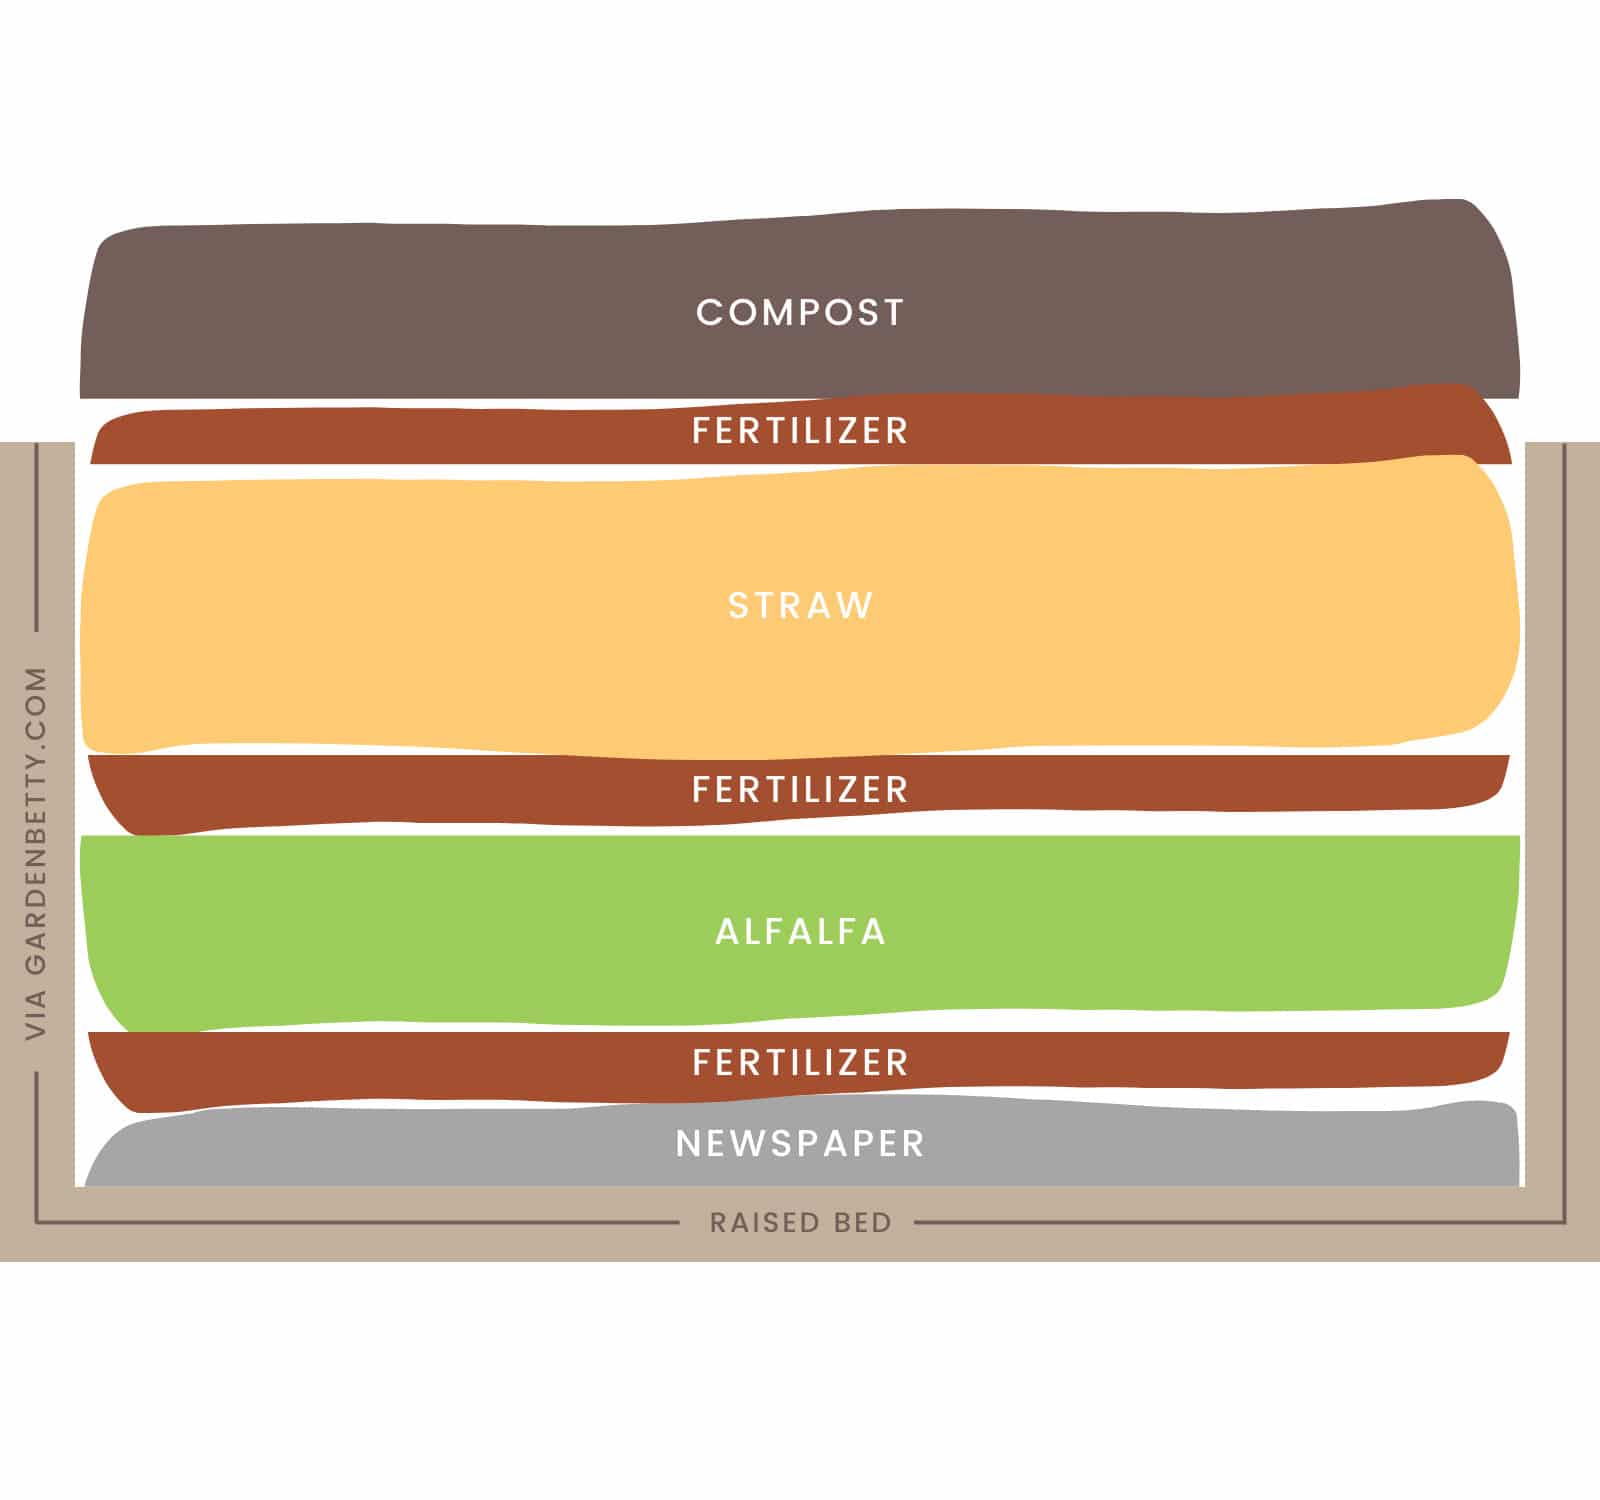
Image above: No-Dig Gardening Chart.
I decided to try this method for filling my clawfoot tub, since straw and alfalfa are cheap and easy to come by at my local feed store, and I could use them to mulch and amend several other beds in the garden.
I started with about 10 sheets of newspaper layered in the bottom of the tub. In my case, they were less for weed suppression, and more for adding brown matter and providing food for the worms that will make their home in the tub.
Next came a generous dusting of fertilizer — I chose bone meal and blood meal, but animal manure or any high-nitrogen fertilizer would work. Rather than following the suggested application on the packages, I tossed in a few handfuls of each, then watered them in well. (A few handfuls is much more than you would typically use if you were fertilizing a bed, but in this case, the extra bone meal and blood meal is added to accelerate the breakdown of the layers.)
Then came the alfalfa. Alfalfa (also called lucerne hay) is the same stuff used as horse feed. It comes in bales that pull apart in 3-inch pads and makes an excellent base for a no-dig garden.
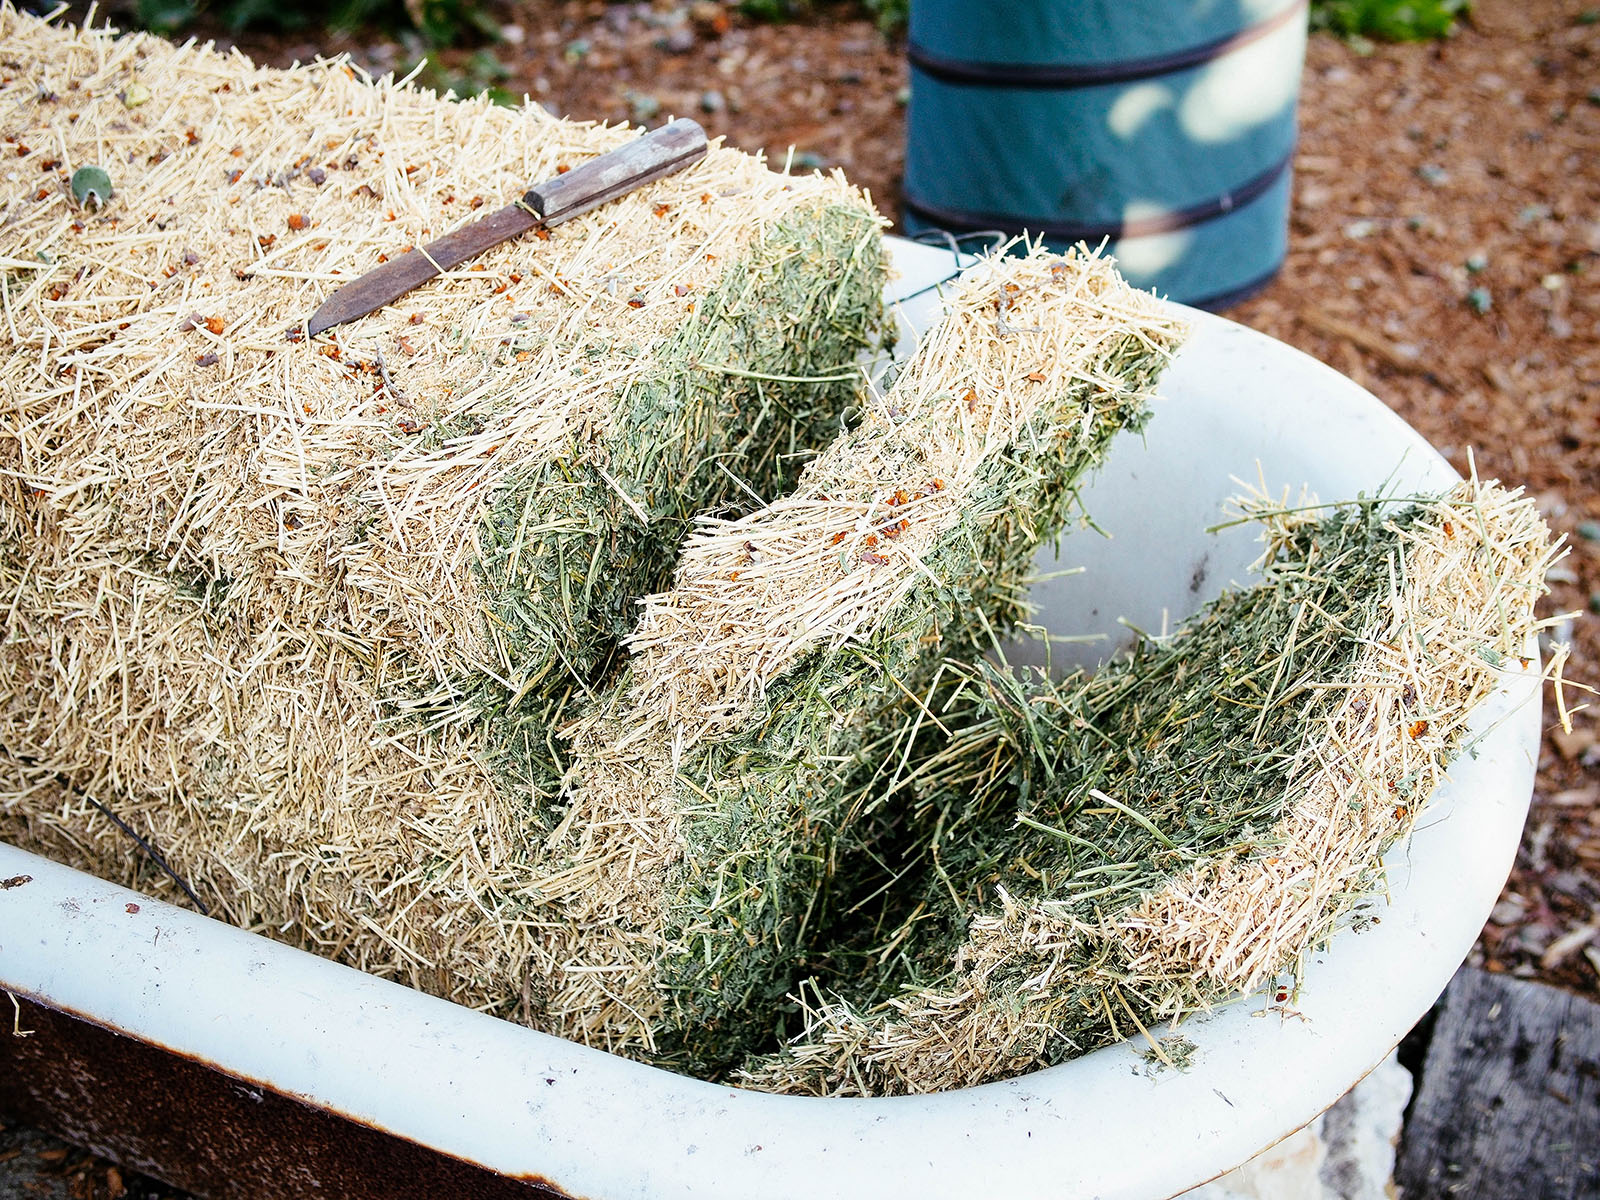
Image above: "Bale of alfalfa (lucerne hay)
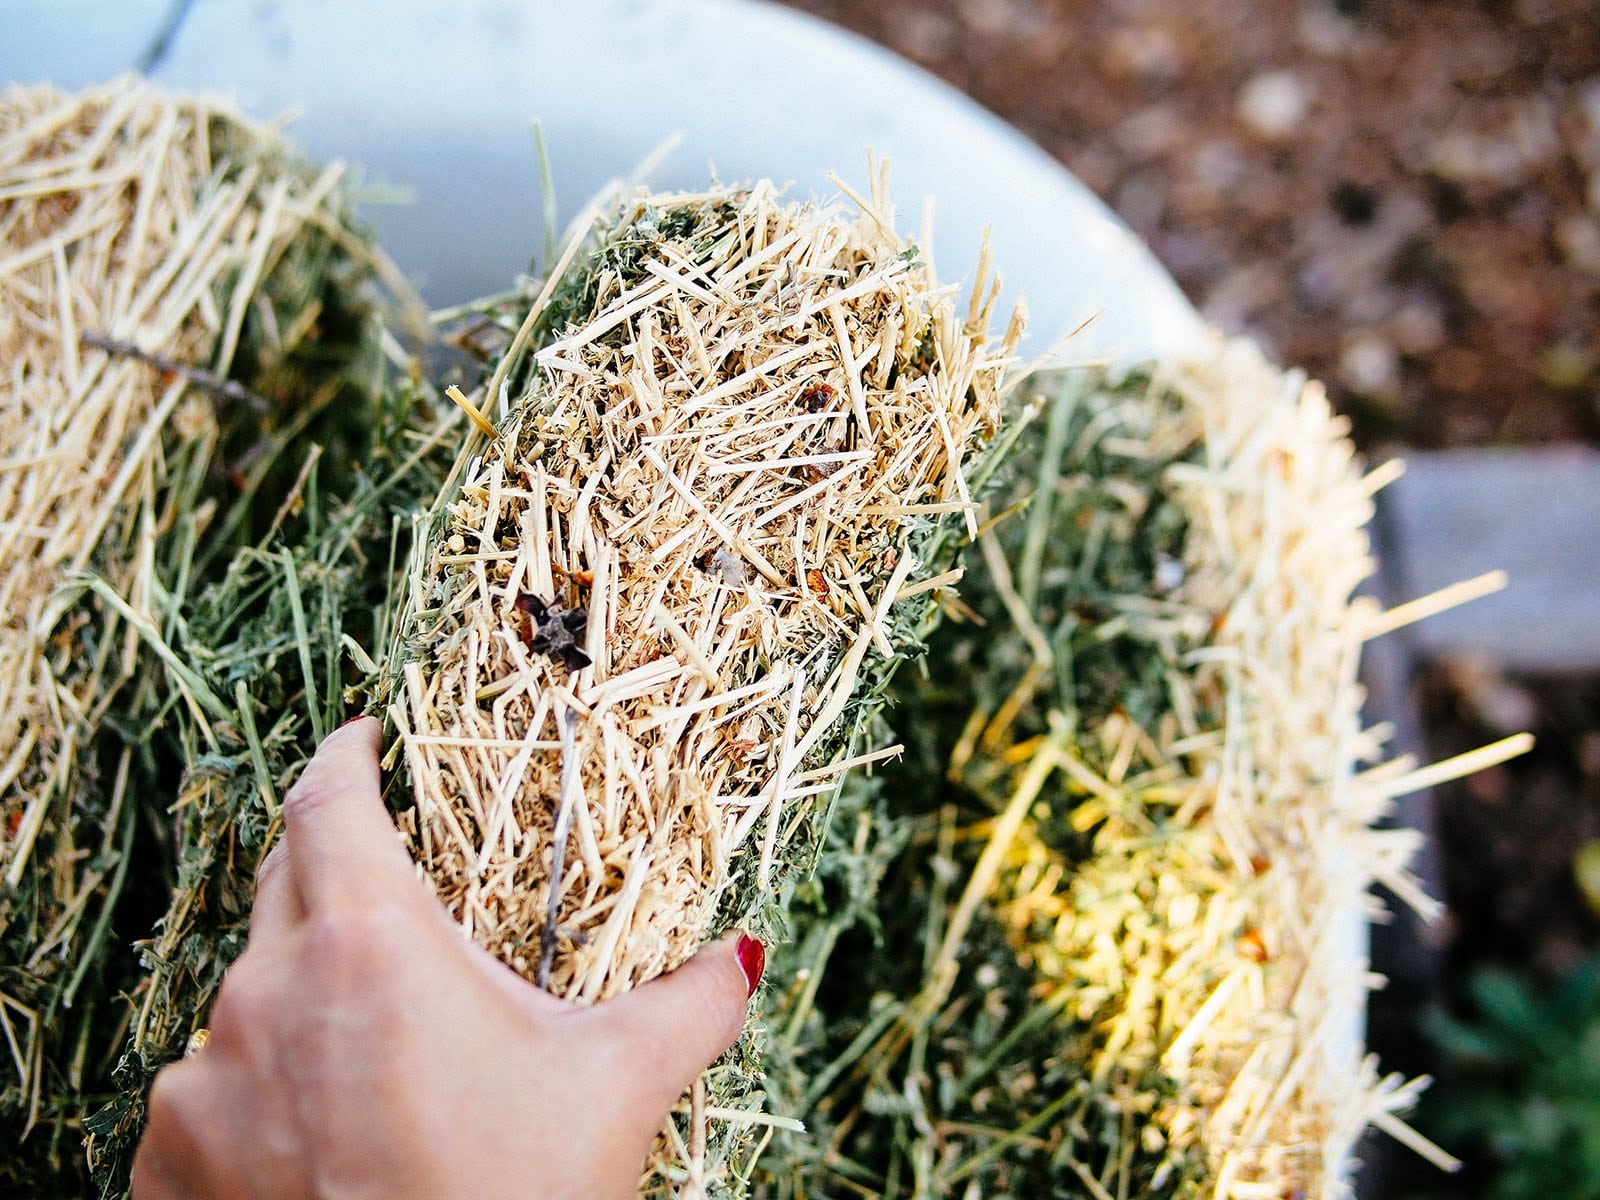
Image above: Close uo of alfalfa.
With its super nutritious and high nitrogen content, it rots quickly, providing rich organic matter for plants and helping other materials decompose. I covered the bottom of my tub with two layers of alfalfa pads (about 6 inches), a few more handfuls of bone meal and blood meal, then soaked them thoroughly with a hose.
On top of the alfalfa, I added a thick layer of straw (about 12 inches, or double my alfalfa layer).
Straw is basically hay without the grains; it’s the hollow stems and dried leaves left behind after all the grains and seeds have been harvested. It’s not as nitrogen-rich, but breaks down quickly into compost and contains fewer seeds, meaning less weeds growing in your no-dig bed.
Really pack in and pack down the straw in your raised bed (even building the layer up to the lip), as it will greatly compress after a couple of months.

Image above: Bale of Straw.
Following the straw was another generous dusting of bone meal and blood meal, and another soak with the hose.
Finally, the topmost layer was a healthy addition of compost (about 3 to 6 inches). Whatever you use, it should be well rotted and teeming with microbes. This is the layer you’ll be seeding and planting in, so don’t skimp on the compost. Wet it down, and you’re ready to plant!
In a standard-depth raised bed, the ratio of layers would more likely look like this from the bottom up:
The no-dig method also works for reviving an old raised bed; just omit the straw layer and add the rest on top of the existing soil. I had a bed sit empty and dry for a couple of months, and its soil had turned into heavy, compacted earth. I stacked on the newspaper, bone and blood meal, alfalfa, more bone and blood meal, then topped off with homemade compost, and sprayed each layer with water.
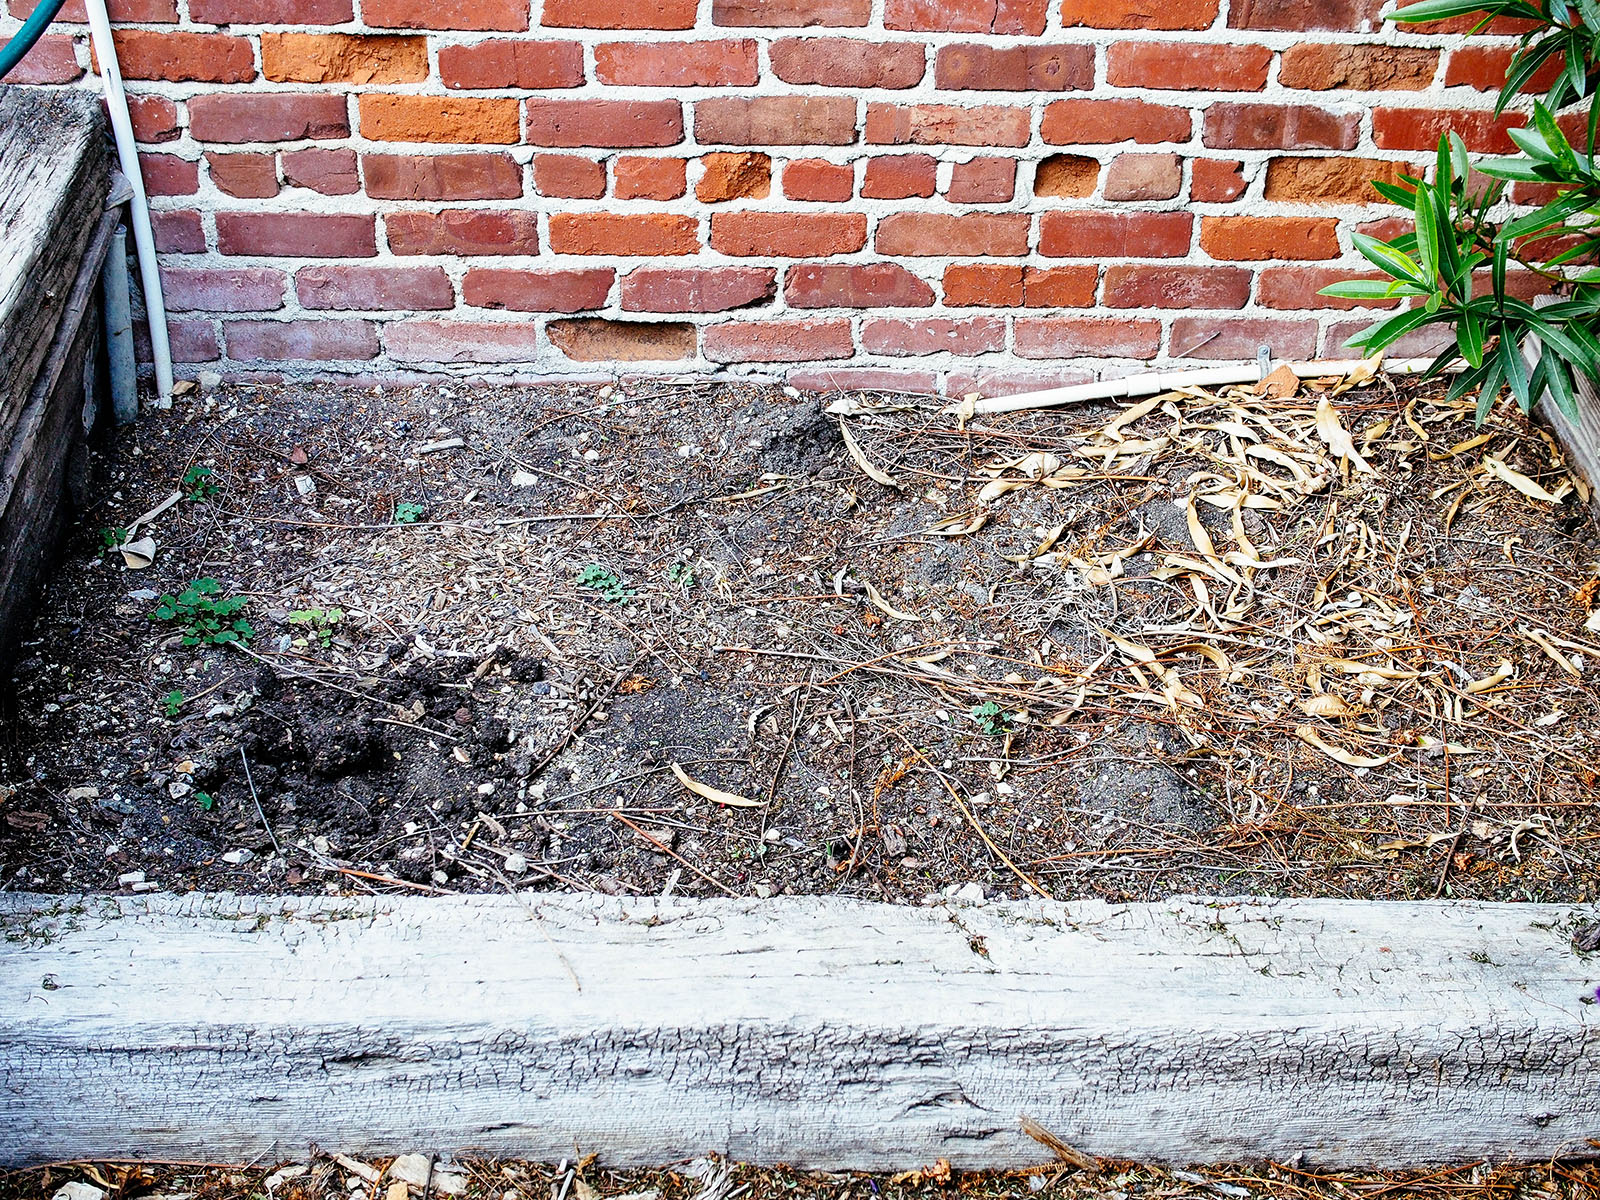
Image above: Neglected garden bed.
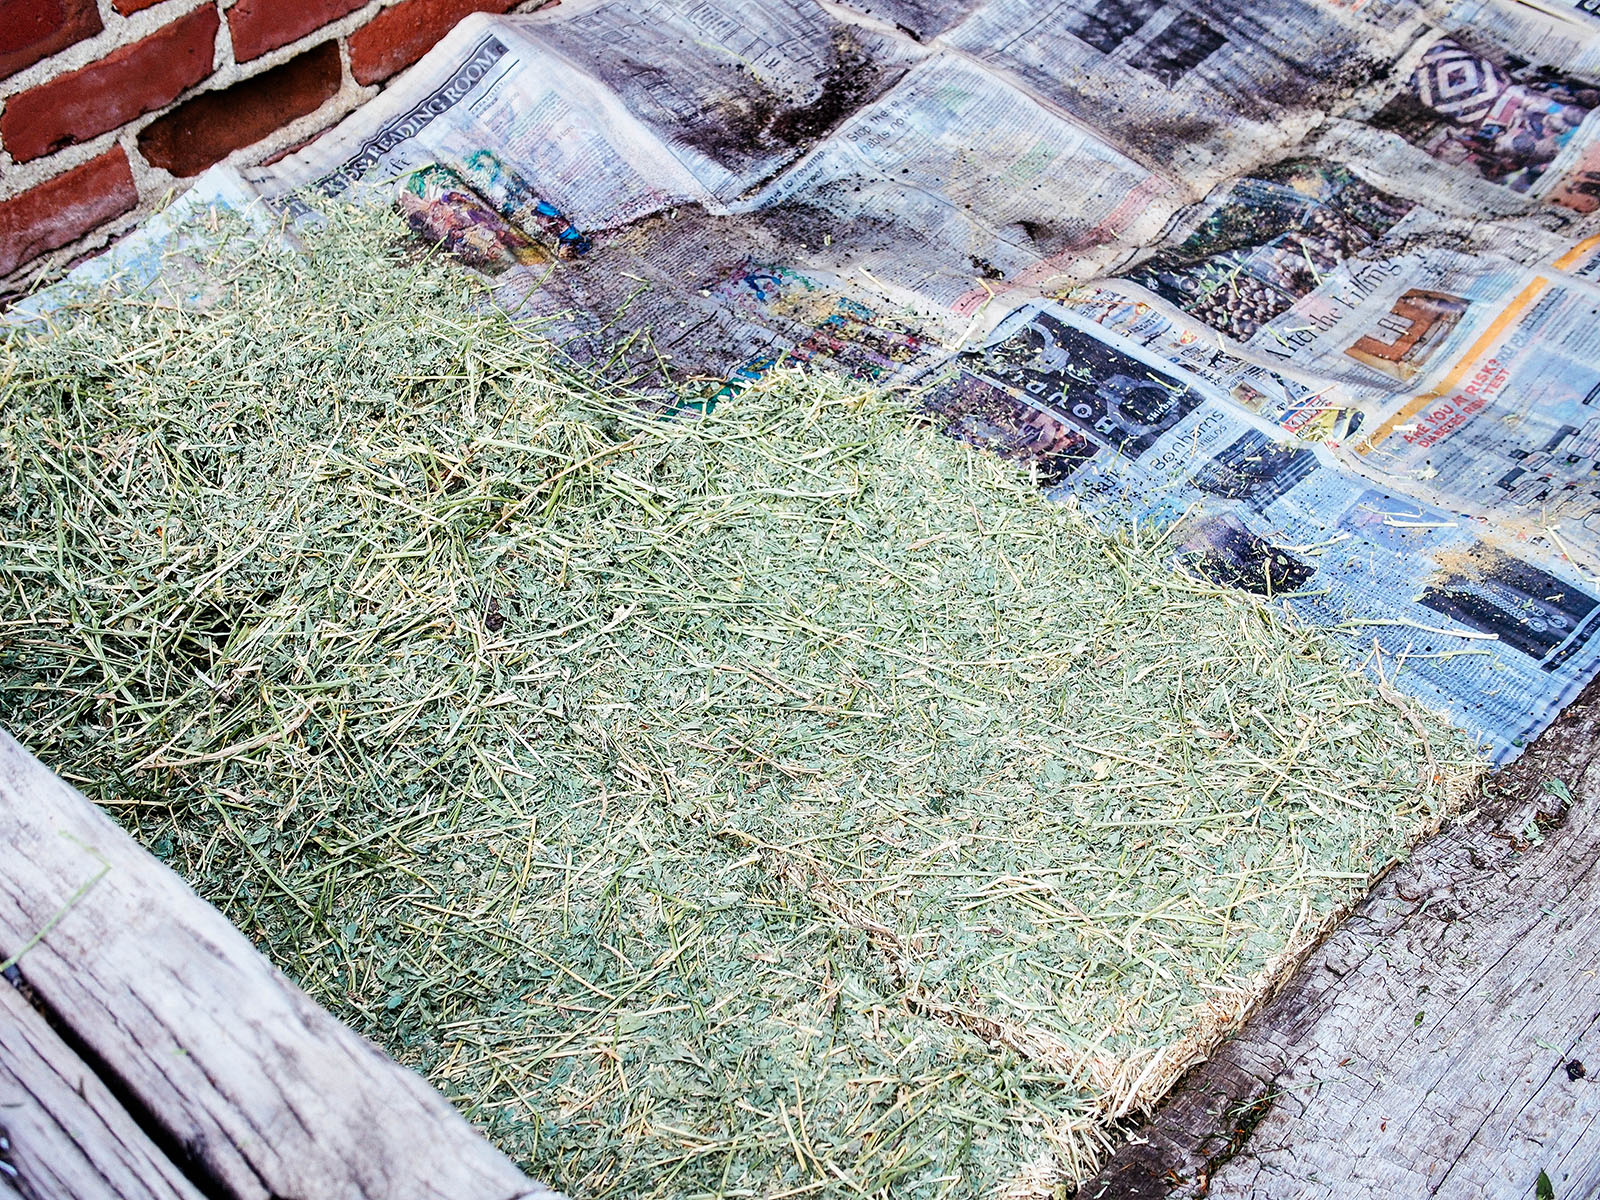
Image above: Alfalfa pads spread across raised bed.
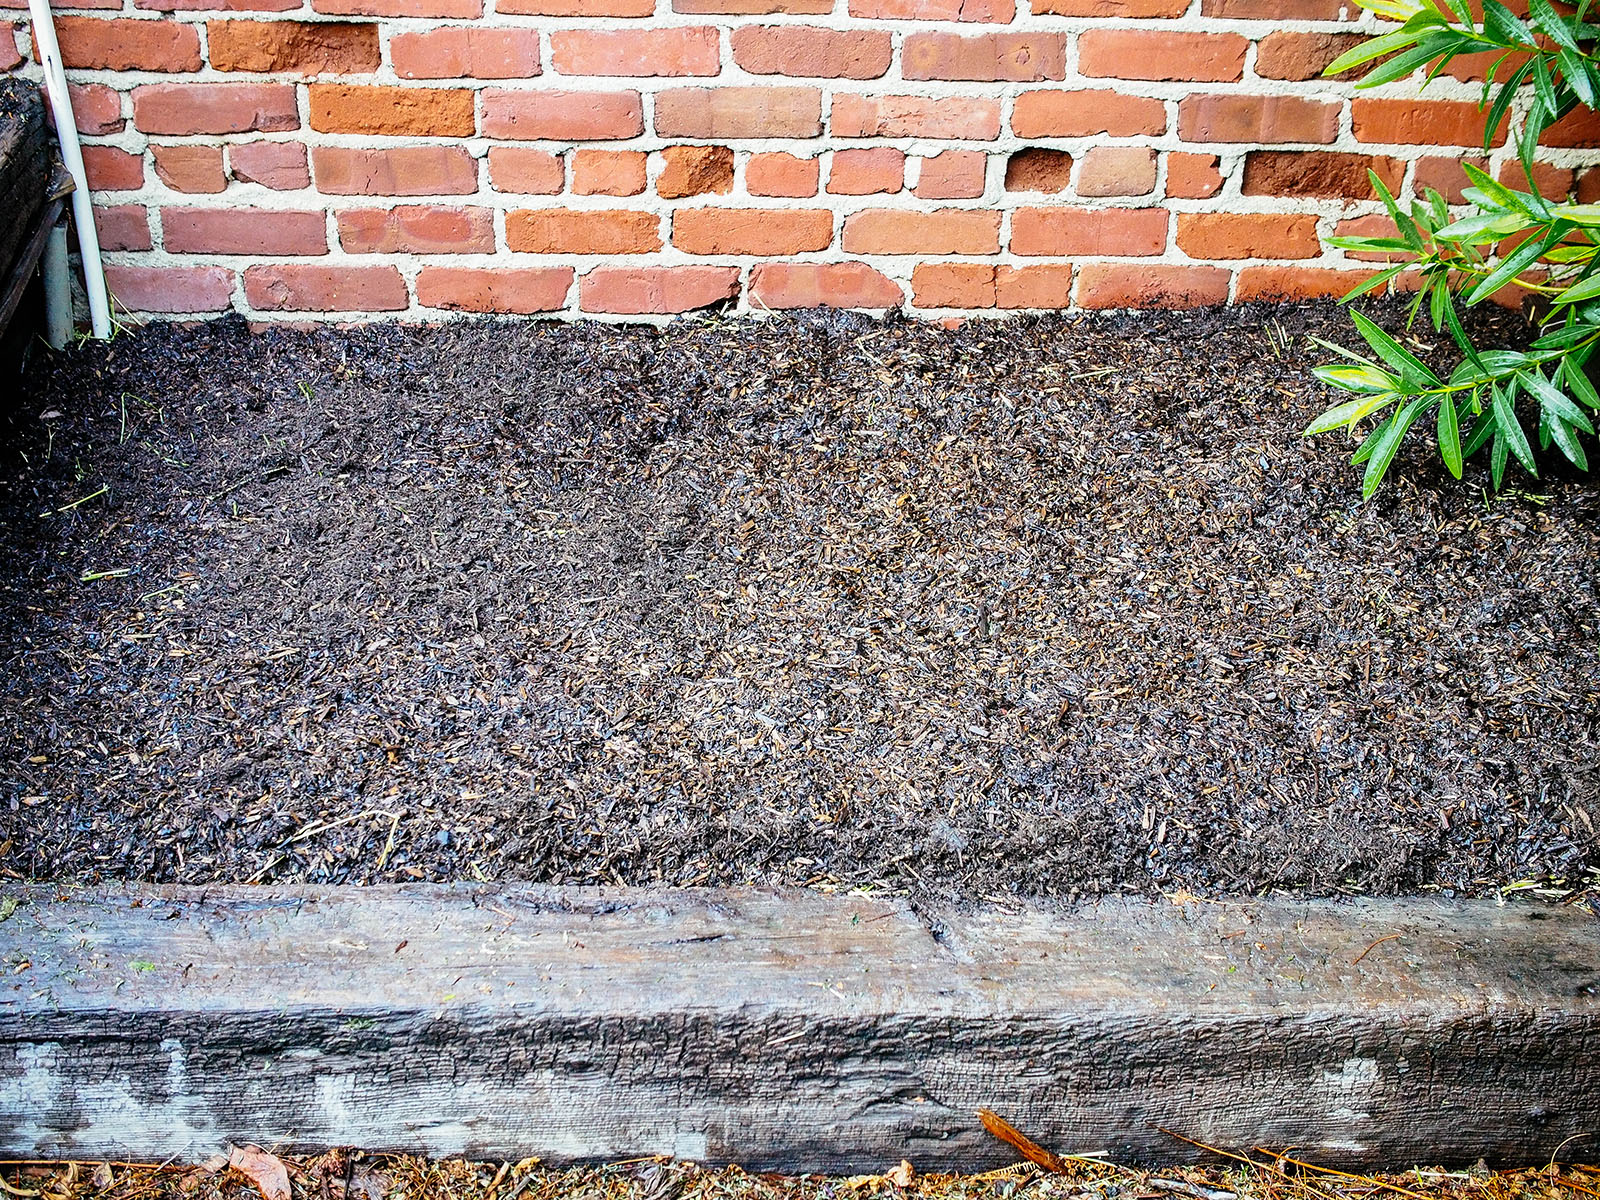
Image above: Newly revived garden bed.
I didn’t plant in the bed, but watered it with the rest of the garden through winter and now have lush, aerated soil to plant in spring.
Going back to the bathtub, this is what it looks like today, planted with kale, turnip, and lettuce.
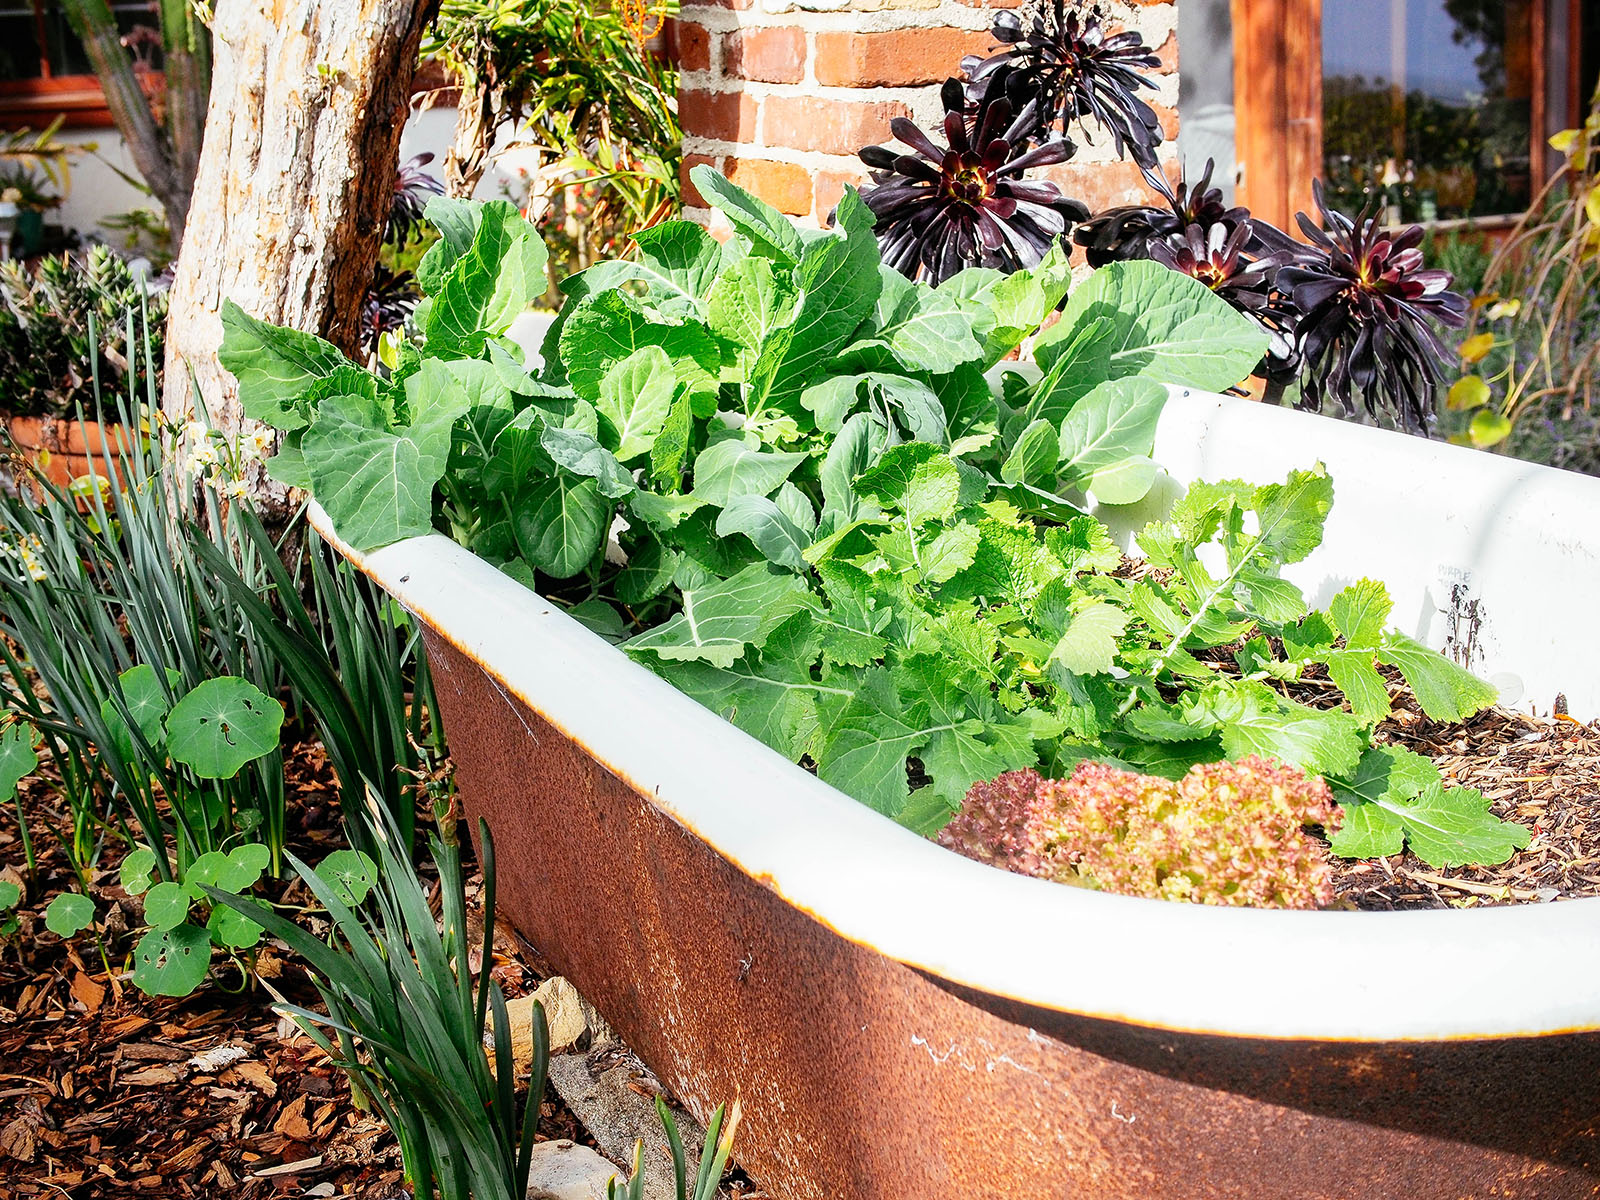
Image above: Leafy greens in clawfoot tub.
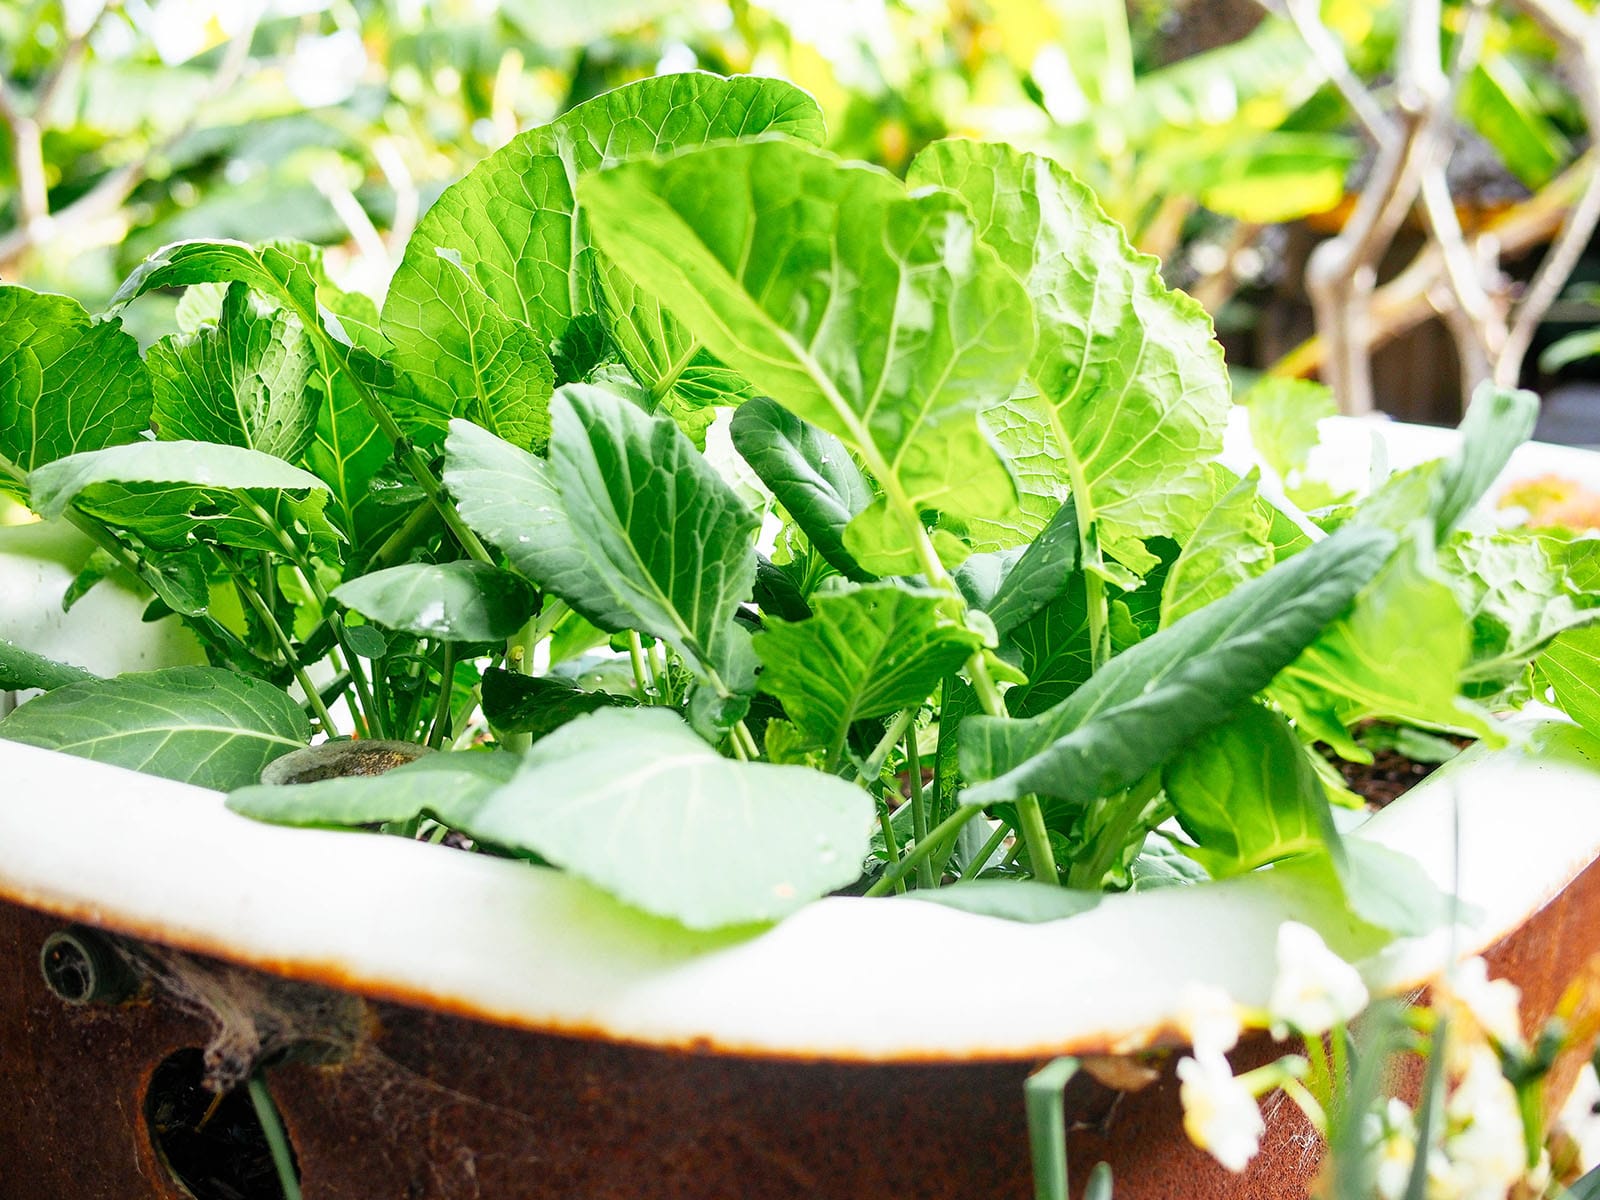
Image above: Portuguese kale.
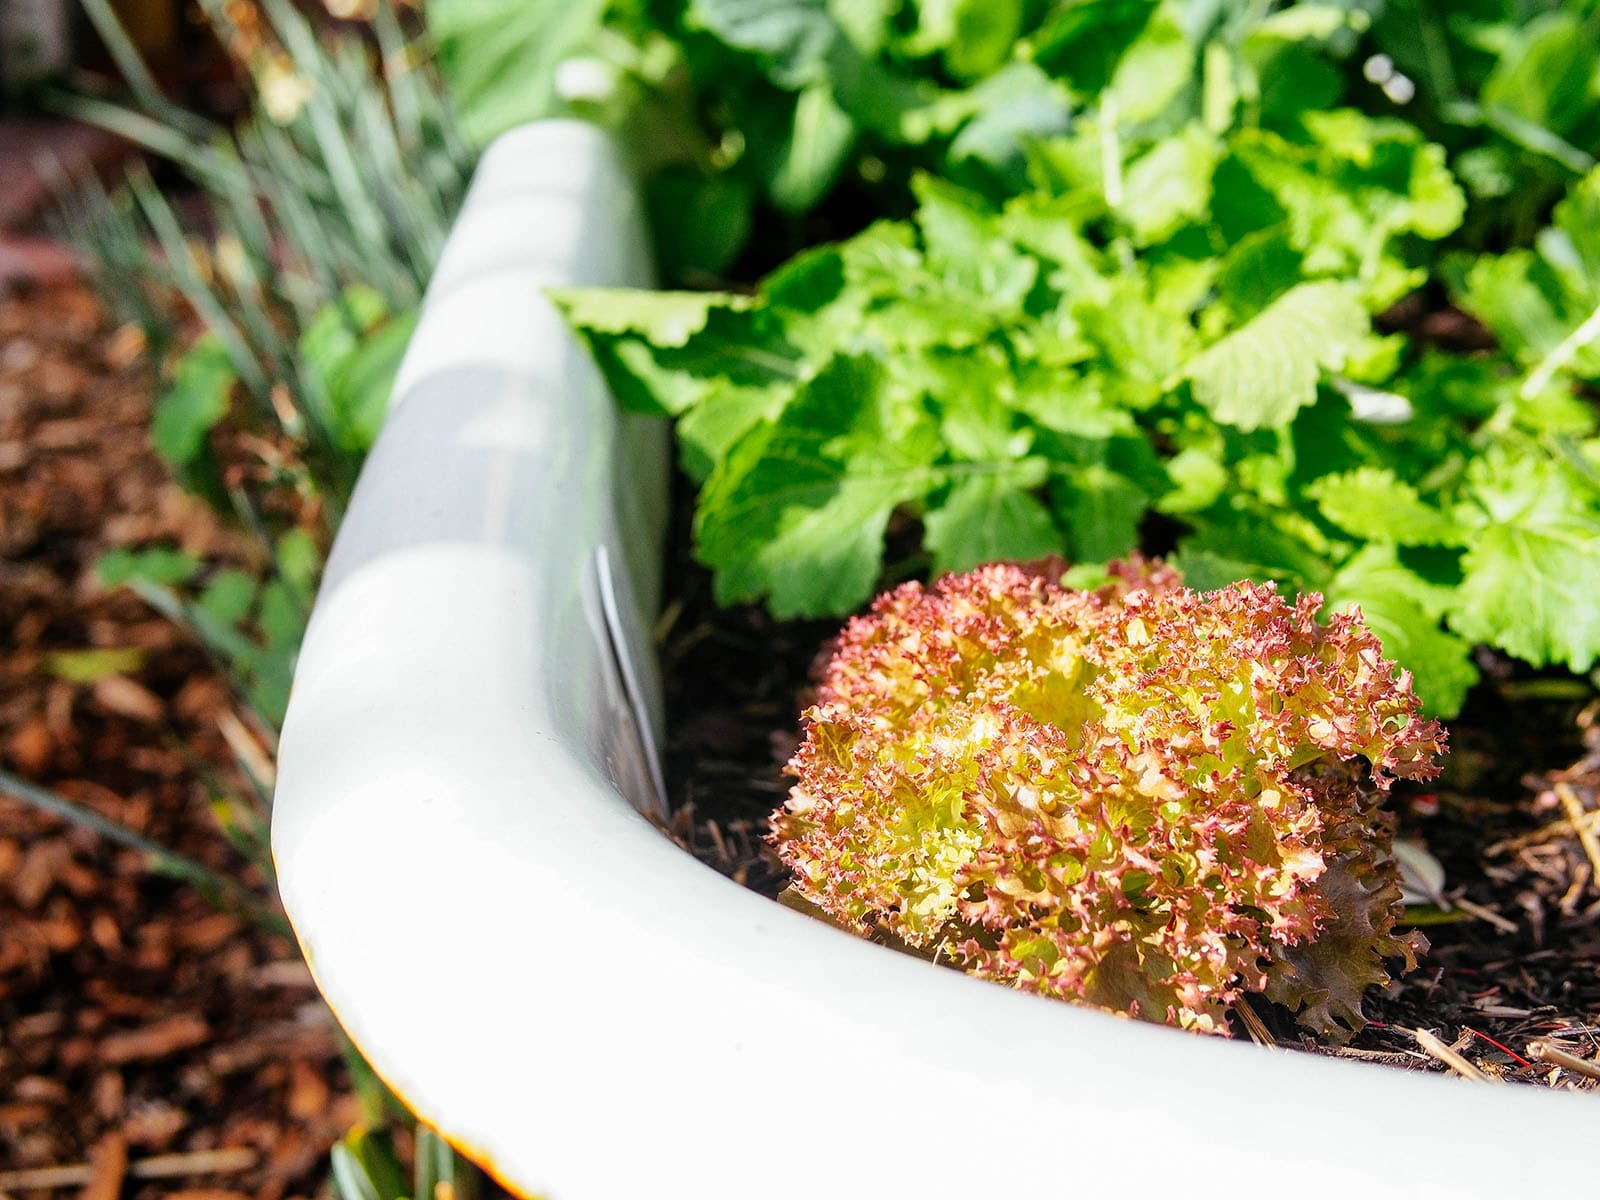
Image above: Red lettuce.
I started everything from seed and they sprouted within a week. I watered like normal and did not fertilize the bed. (Though going into spring, I’ll be amending with fish emulsion or compost tea to replenish the nitrogen in the soil.)
I’ve read from a few sources that newly built no-dig beds work best with shallow-rooted plants until the layers break down into humus. But from the looks of it, my turnips (shown here in the foreground) are faring well so far.
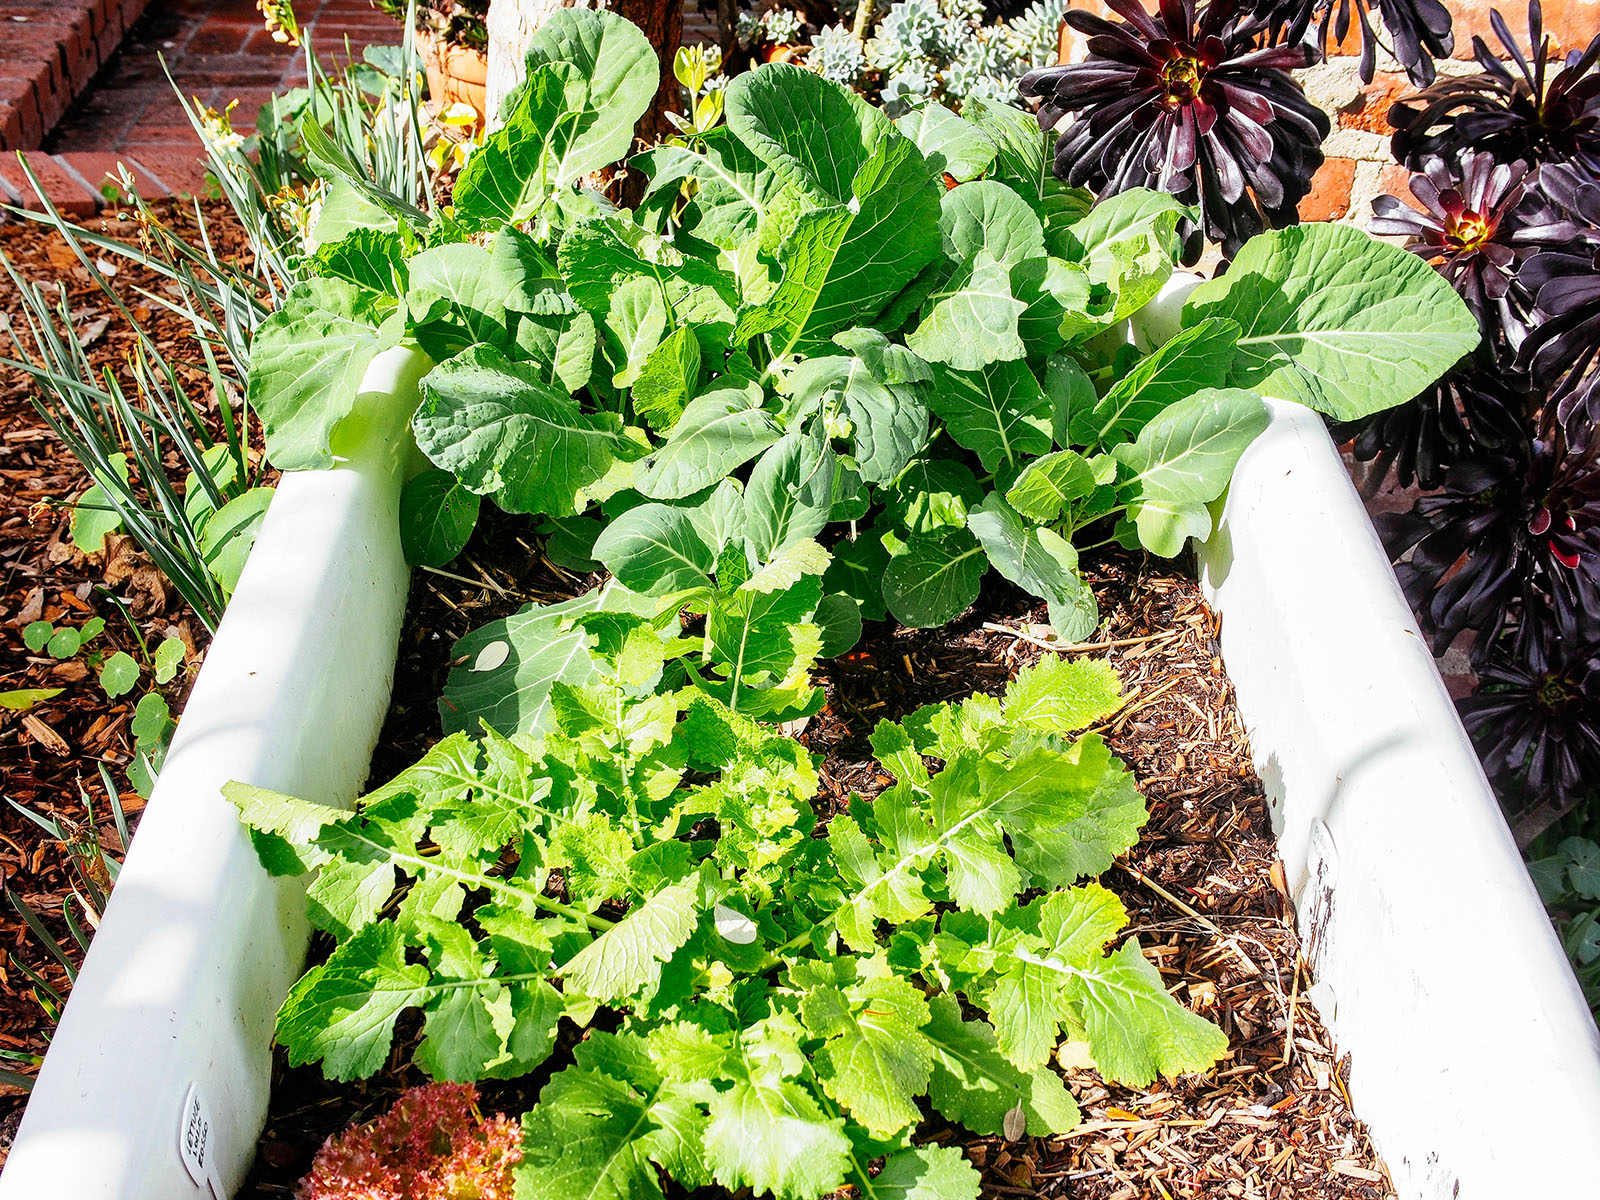
Image above: Kale, turnips, and lettuce growing in bathtub planter.
I probably wouldn’t plant, say, carrots or daikon in a first-season bed as they’re very deep-rooted. I’d avoid planting peas and beans as they can be sensitive to the salinity in high-nitrogen fertilizers.
Excess nitrogen can also cause fruiting plants to produce lots of foliage but fewer flowers. By the second season, however, all that alfalfa and straw will have turned into rich black soil that’s ideal for all of those varieties.
Like any raised bed, you should top off and amend your no-dig bed every season with soil and compost. But once it’s established, maintaining it requires no real effort and reviving it (if you’ve neglected to plant or amend) requires no back-breaking digging. Simply build upon the layers again and let nature do the work.

Vintage bathtub planter.
.
By Linda Ly on 5 March 2014 for Garden Betty -
(http://www.gardenbetty.com/2014/03/the-no-dig-vegetable-garden/)
Image above: Claw foot porcelain tub planter. From original article).
[IB Publisher note: This article wasn't posted for the cute claw footed tub, but for the thin, efficient, economic soil recipe that is described using mostly straw, alfalfa and newspaper.]
I started a new garden bed last fall, and I didn’t dig a thing. It actually would’ve been pretty challenging to dig anything, as I started the new bed in an old bathtub. In my backyard! Four months later, the first plants seeded are finally thriving, thanks to the longer days.
I inherited this vintage, enameled-steel clawfoot tub from the previous owners after I moved into my house a few years ago. They had it propped up under the feijoa tree on a stack of stones, and for many summers it was our repurposed party cooler, filled to the brim with ice and stuffed with cases of beer. But having the tub sit empty the rest of the year seemed silly, especially since we weren’t using it as an actual tub to wash anything in the garden.
Image above: Rusty clawfoot porcelain iron tub.
I envisioned turning it into a planter (especially a future planter for potatoes and sweet potatoes, where the tubers could be contained), but the massive size made filling it with good-quality soil a little cost-prohibitive, considering we needed to top off all our existing beds as well. I started looking into no-dig methods for building raised beds, which pile on layers of organic materials that decompose over a season to create humus-rich earth.
There are several styles of no-dig gardening, including straw bale gardening, lasagna gardening, and sheet mulching, but I was most intrigued with Esther Deans’ method, which appeared suspiciously simple. The Australian gardener and author promoted a style of no-dig gardening (you can still find her book
Deans’ method comprised a specific formula that started with newspaper and added fertilizer, alfalfa, straw, and finally compost. The layers could be built over a soft surface like grass or dirt — or even a hard surface like concrete, though the raised bed would have to be deep enough for deep-rooted vegetables to thrive.
Image above: No-Dig Gardening Chart.
I decided to try this method for filling my clawfoot tub, since straw and alfalfa are cheap and easy to come by at my local feed store, and I could use them to mulch and amend several other beds in the garden.
I started with about 10 sheets of newspaper layered in the bottom of the tub. In my case, they were less for weed suppression, and more for adding brown matter and providing food for the worms that will make their home in the tub.
Next came a generous dusting of fertilizer — I chose bone meal and blood meal, but animal manure or any high-nitrogen fertilizer would work. Rather than following the suggested application on the packages, I tossed in a few handfuls of each, then watered them in well. (A few handfuls is much more than you would typically use if you were fertilizing a bed, but in this case, the extra bone meal and blood meal is added to accelerate the breakdown of the layers.)
Then came the alfalfa. Alfalfa (also called lucerne hay) is the same stuff used as horse feed. It comes in bales that pull apart in 3-inch pads and makes an excellent base for a no-dig garden.
Image above: "Bale of alfalfa (lucerne hay)
Image above: Close uo of alfalfa.
With its super nutritious and high nitrogen content, it rots quickly, providing rich organic matter for plants and helping other materials decompose. I covered the bottom of my tub with two layers of alfalfa pads (about 6 inches), a few more handfuls of bone meal and blood meal, then soaked them thoroughly with a hose.
On top of the alfalfa, I added a thick layer of straw (about 12 inches, or double my alfalfa layer).
Straw is basically hay without the grains; it’s the hollow stems and dried leaves left behind after all the grains and seeds have been harvested. It’s not as nitrogen-rich, but breaks down quickly into compost and contains fewer seeds, meaning less weeds growing in your no-dig bed.
Really pack in and pack down the straw in your raised bed (even building the layer up to the lip), as it will greatly compress after a couple of months.
Image above: Bale of Straw.
Following the straw was another generous dusting of bone meal and blood meal, and another soak with the hose.
Finally, the topmost layer was a healthy addition of compost (about 3 to 6 inches). Whatever you use, it should be well rotted and teeming with microbes. This is the layer you’ll be seeding and planting in, so don’t skimp on the compost. Wet it down, and you’re ready to plant!
In a standard-depth raised bed, the ratio of layers would more likely look like this from the bottom up:
- 10 sheets of newspaper
- 3 inches of alfalfa (one pad)
- 6 inches of straw
- 3 to 6 inches of compost (or well amended soil)
The no-dig method also works for reviving an old raised bed; just omit the straw layer and add the rest on top of the existing soil. I had a bed sit empty and dry for a couple of months, and its soil had turned into heavy, compacted earth. I stacked on the newspaper, bone and blood meal, alfalfa, more bone and blood meal, then topped off with homemade compost, and sprayed each layer with water.
Image above: Neglected garden bed.
Image above: Alfalfa pads spread across raised bed.
Image above: Newly revived garden bed.
I didn’t plant in the bed, but watered it with the rest of the garden through winter and now have lush, aerated soil to plant in spring.
Going back to the bathtub, this is what it looks like today, planted with kale, turnip, and lettuce.
Image above: Leafy greens in clawfoot tub.
Image above: Portuguese kale.
Image above: Red lettuce.
I started everything from seed and they sprouted within a week. I watered like normal and did not fertilize the bed. (Though going into spring, I’ll be amending with fish emulsion or compost tea to replenish the nitrogen in the soil.)
I’ve read from a few sources that newly built no-dig beds work best with shallow-rooted plants until the layers break down into humus. But from the looks of it, my turnips (shown here in the foreground) are faring well so far.
Image above: Kale, turnips, and lettuce growing in bathtub planter.
I probably wouldn’t plant, say, carrots or daikon in a first-season bed as they’re very deep-rooted. I’d avoid planting peas and beans as they can be sensitive to the salinity in high-nitrogen fertilizers.
Excess nitrogen can also cause fruiting plants to produce lots of foliage but fewer flowers. By the second season, however, all that alfalfa and straw will have turned into rich black soil that’s ideal for all of those varieties.
Like any raised bed, you should top off and amend your no-dig bed every season with soil and compost. But once it’s established, maintaining it requires no real effort and reviving it (if you’ve neglected to plant or amend) requires no back-breaking digging. Simply build upon the layers again and let nature do the work.
Vintage bathtub planter.
.
No comments :
Post a Comment